Table of Contents

How to Join a New Server to an Existing Domain
Author(s): Louis Ouellet
Managing servers in an enterprise environment often involves joining new servers to an existing Active Directory (AD) domain. This process ensures centralized authentication and resource management. In this tutorial, we will walk through the steps to successfully join a Windows Server to an existing domain.
Prerequisites
- Domain Controller: Ensure that an AD Domain Controller is available and accessible.
- Server Preparation: Install the Windows Server OS (e.g., Windows Server 2022 Datacenter).
- Administrative Credentials: Have domain admin credentials to join the server to the domain.
- Network Connectivity: Verify that the server can communicate with the Domain Controller using its Fully Qualified Domain Name (FQDN).
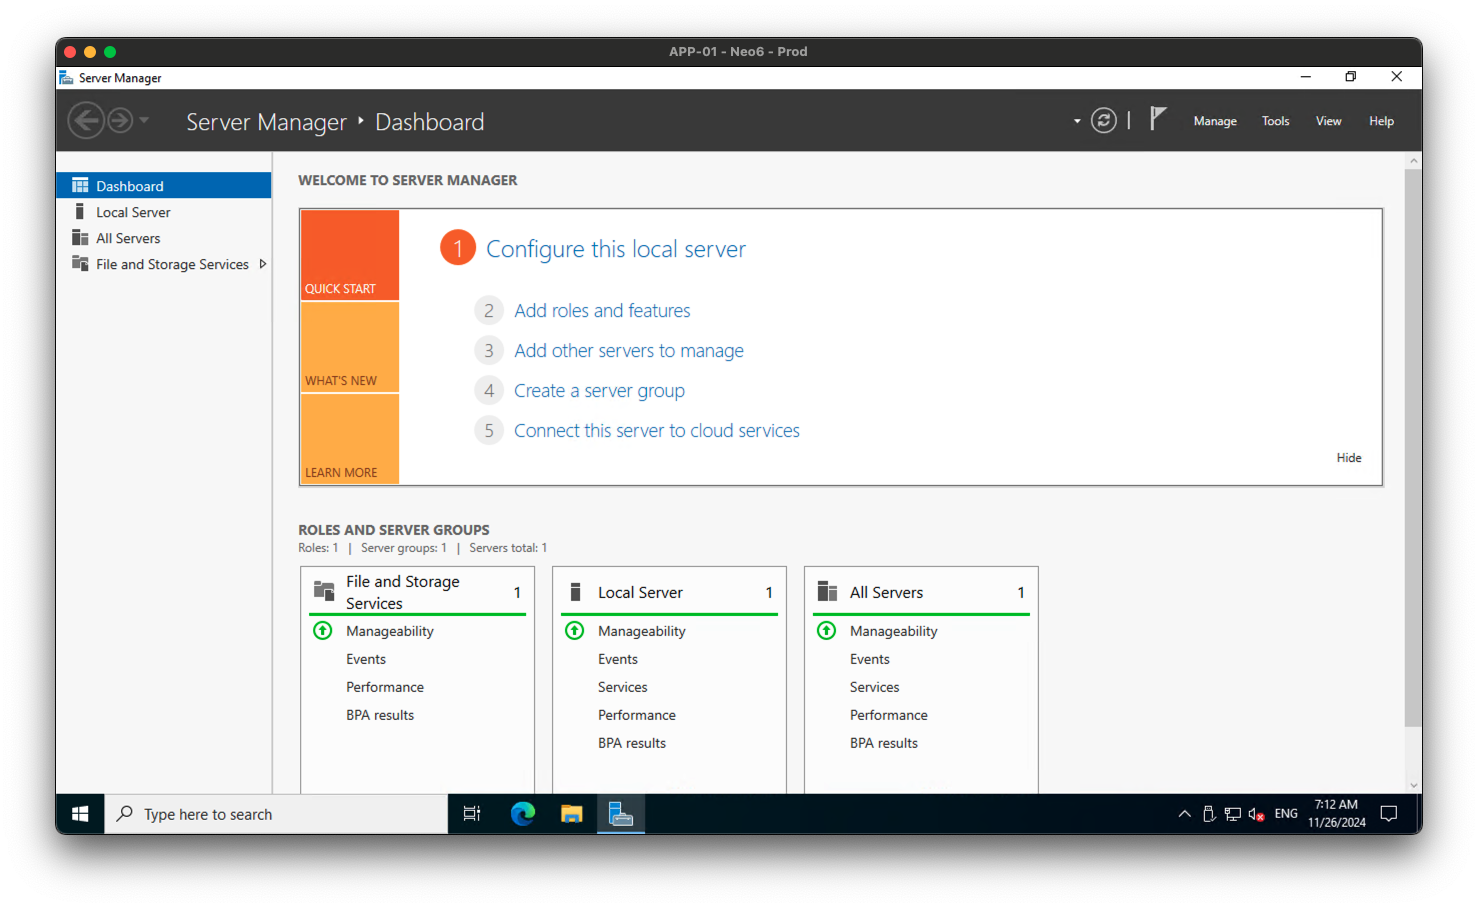
Step 1: Open Server Manager
 Upon logging in to your new Windows Server, Server Manager automatically opens. If it doesn’t, you can manually open it from the Start Menu.
Step 2: Access System Settings

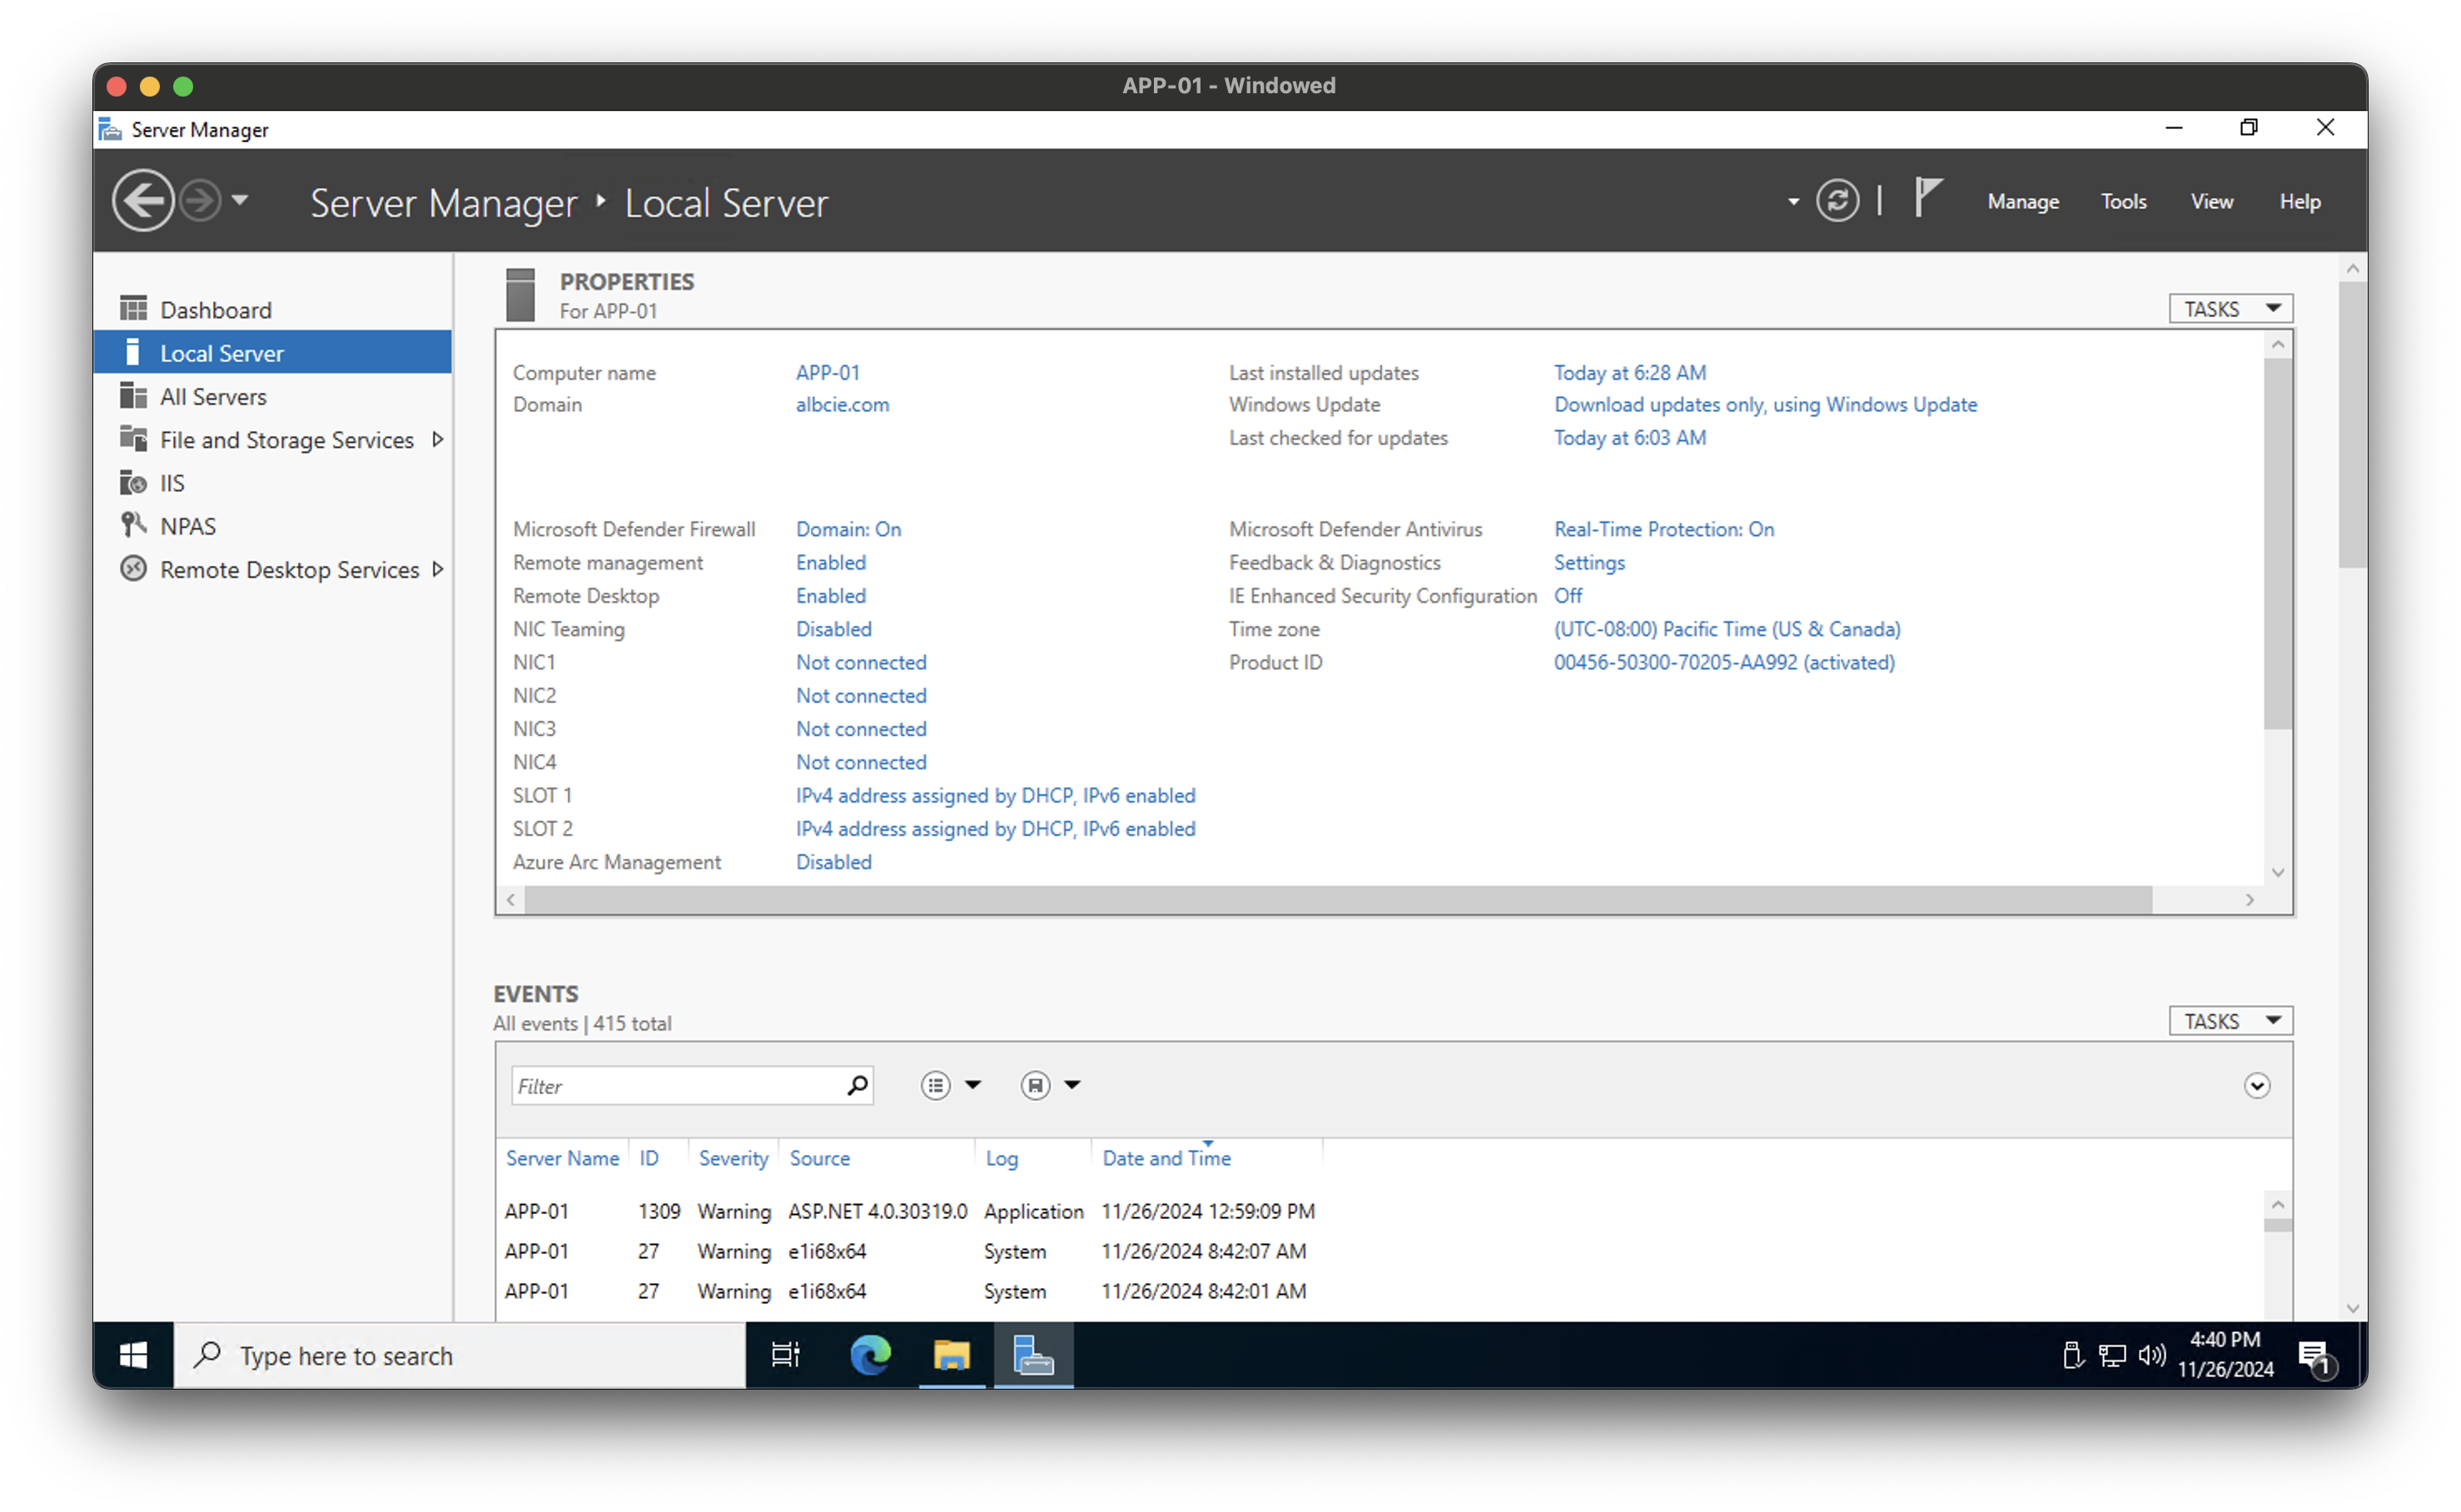
- In Server Manager, navigate to the
Local Servertab on the left sidebar. - Click on the Workgroup link next to
Computer Nameunder thePropertiessection.
Step 3: Modify the Computer Name and Domain

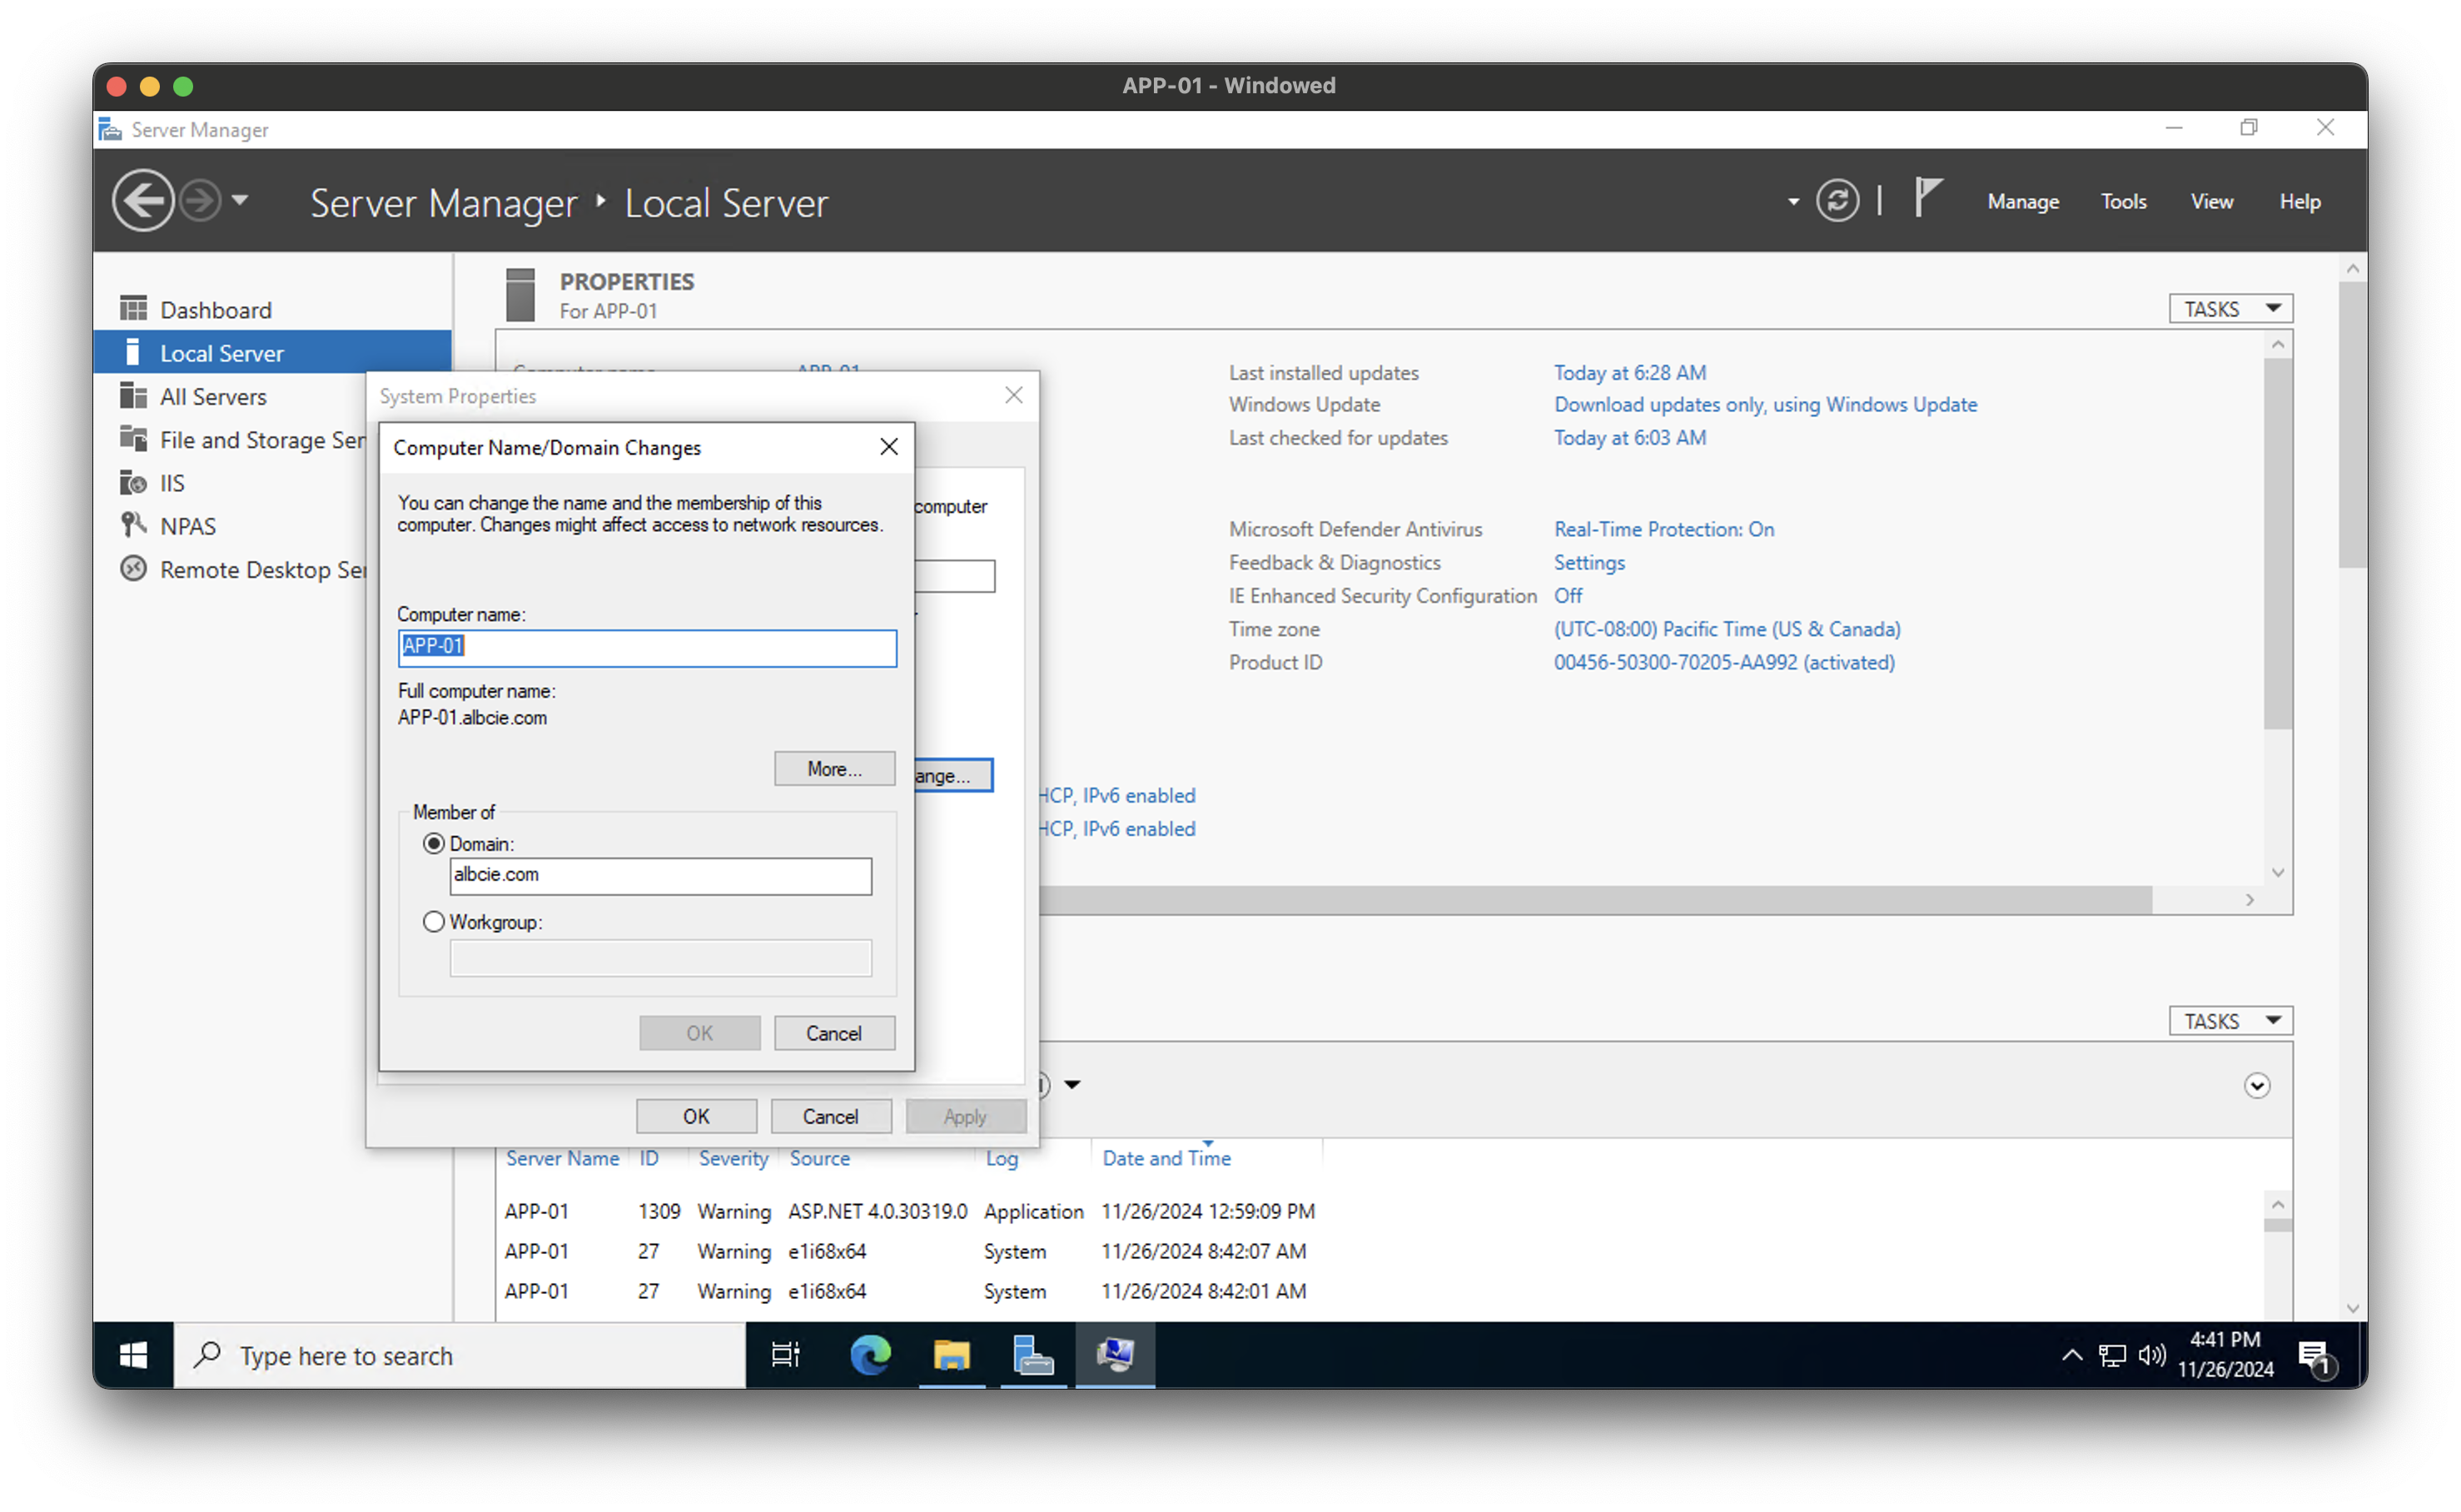
- In the System Properties window, click on the Change button.
- In the next dialog:
- Update the Computer Name if necessary to make it unique.
- Select the Domain option, then enter the domain name (e.g.,
albcie.com).
- Click OK to proceed.
Step 4: Authenticate
A dialog box will appear prompting for domain credentials. Enter the username and password of a domain administrator and click OK.
Step 5: Confirmation
- After authentication, a message will confirm successful addition to the domain.
- You will see a welcome message indicating that the server is now a member of the specified domain.
Step 6: Restart the Server
For the changes to take effect, you must restart the server:
- You will be prompted to restart immediately. Choose Restart Now to proceed, or schedule a restart later.
Step 7: Verify the Domain Join
After the restart:
- Log in using a domain account (e.g.,
DOMAIN\username). - Open Server Manager and verify that the server is listed as part of the domain.
Troubleshooting Tips
- DNS Configuration: Ensure the server’s DNS settings point to the Domain Controller’s IP address.
- Time Synchronization: Check that the server’s time is synchronized with the Domain Controller.
- Firewall Settings: Allow necessary ports for domain communication, including TCP 389 (LDAP), TCP/UDP 53 (DNS), and others.
Conclusion
By following these steps, you can seamlessly integrate a new server into your Active Directory domain, enabling centralized management and enhanced security. Stay tuned for more server management tutorials and tips!
Tags
