Table of Contents

How to Publish a Remote Application using Windows Server RDS
Author(s): Louis Ouellet
In today’s fast-paced, remote-friendly world, businesses are increasingly relying on tools that enable seamless access to applications from anywhere. Windows Server Remote Desktop Services (RDS) is a robust solution that allows organizations to centralize application management while providing users with secure and efficient access to their work tools. With RDS, you can publish individual applications—referred to as RemoteApps—without exposing the entire desktop environment, making it a versatile choice for IT administrators and end-users alike.
In this guide, titled “How to Publish a Remote Application using Windows Server RDS”, we’ll walk you through the process of configuring RDS and publishing a RemoteApp step-by-step. Whether you’re an IT professional setting up RDS for the first time or looking to fine-tune your deployment, this article will provide the insights you need to get started. From installation to distribution and troubleshooting, you’ll learn how to make RemoteApp an integral part of your organization’s productivity toolkit. Let’s dive in!
Pre-Requisites
Before we begin, make sure you have the following pre-requisites in place:
- A Windows Server machine with Remote Desktop Services installed.
- A user account with administrative privileges on the server.
- The application you want to publish as a RemoteApp installed on the server.
- A network connection to the server.
- A client machine with Remote Desktop Connection installed.
- A user account with access to the RemoteApp.
Step 1: Install Remote Desktop Services
The first step in publishing a RemoteApp is to install the Remote Desktop Services role on your Windows Server machine. Thankfully for us, I have already written a guide on how to install Remote Desktop Services on Windows Server. You can find the guide How to Install Remote Desktop Services on Windows Server 2022.
Step 2: Configure your Firewall
Before you can publish a RemoteApp, you need to ensure that your firewall is configured to allow Remote Desktop connections. We will need to open File and Printer Sharing ports (SMB) to allow the RemoteApp to access shared resources on the network.
To open the File and Printer Sharing ports, follow these steps:
- In the Server Manager, click on the Tools menu and select
Windows Defender Firewall with Advanced Security.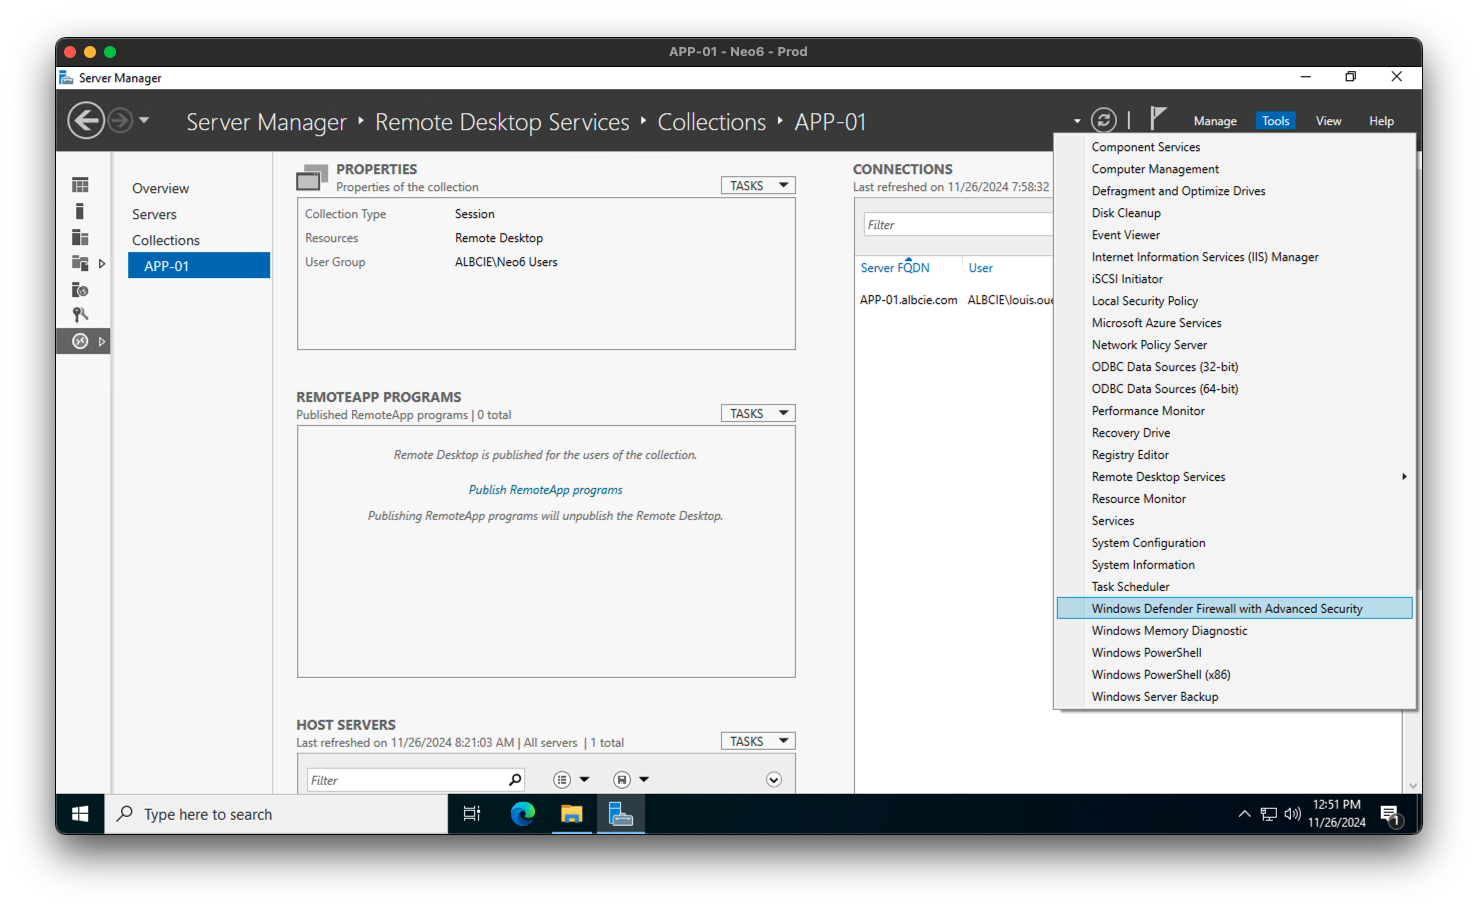
- In the Windows Defender Firewall with Advanced Security window, click on
Inbound Rules. - Scroll down and locate the rules named
File and Printer Sharing (SMB-In).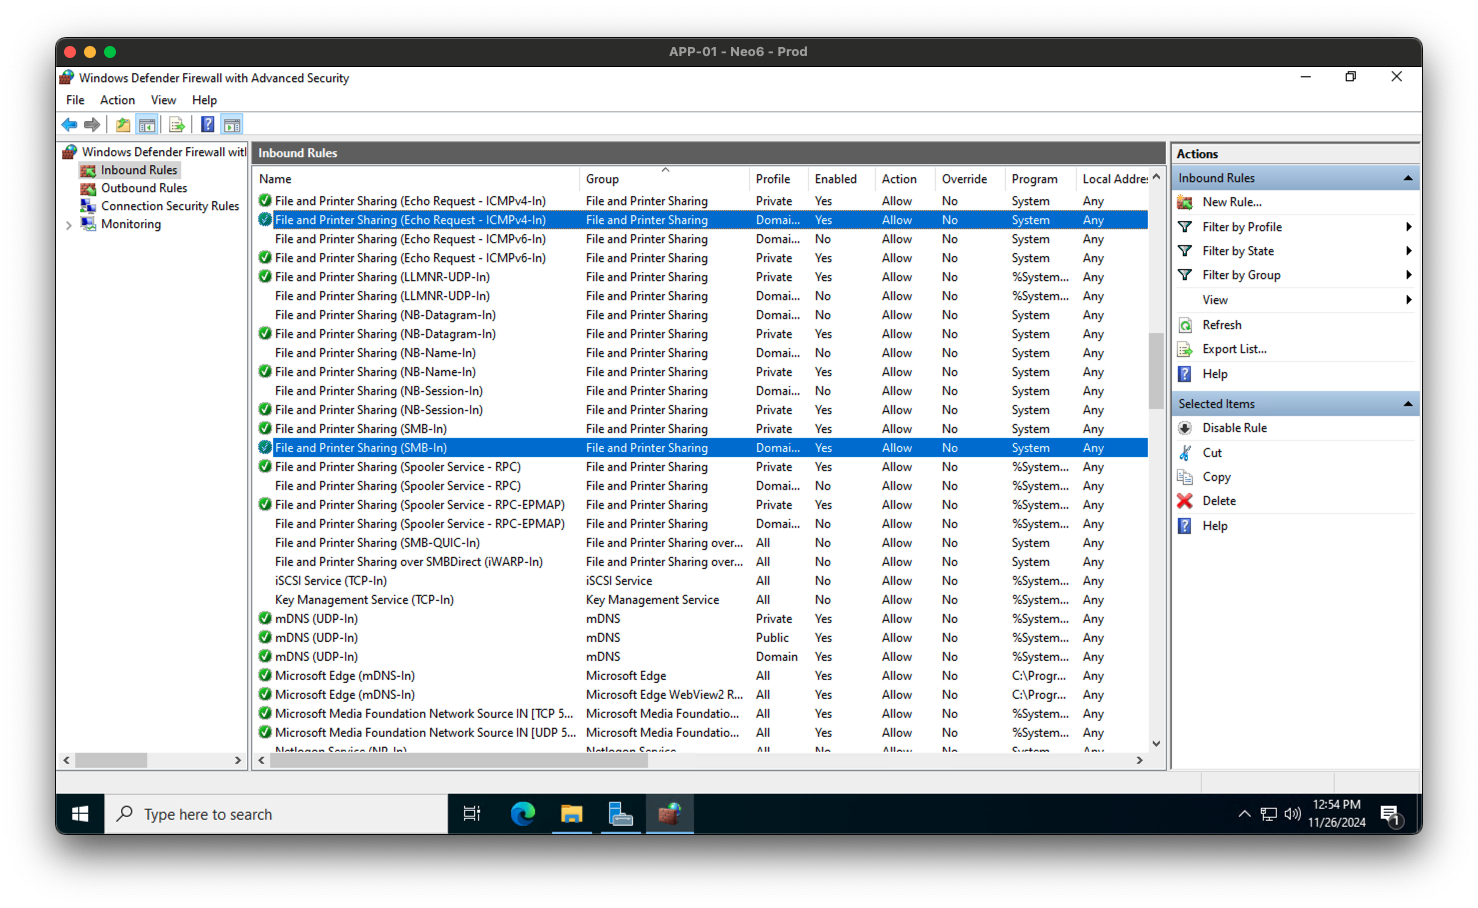
- In the Action pane on the right, click on
Enable Rule. - Repeat the same steps for the
File and Printer Sharing (SMB-Out)rule in theOutbound Rules.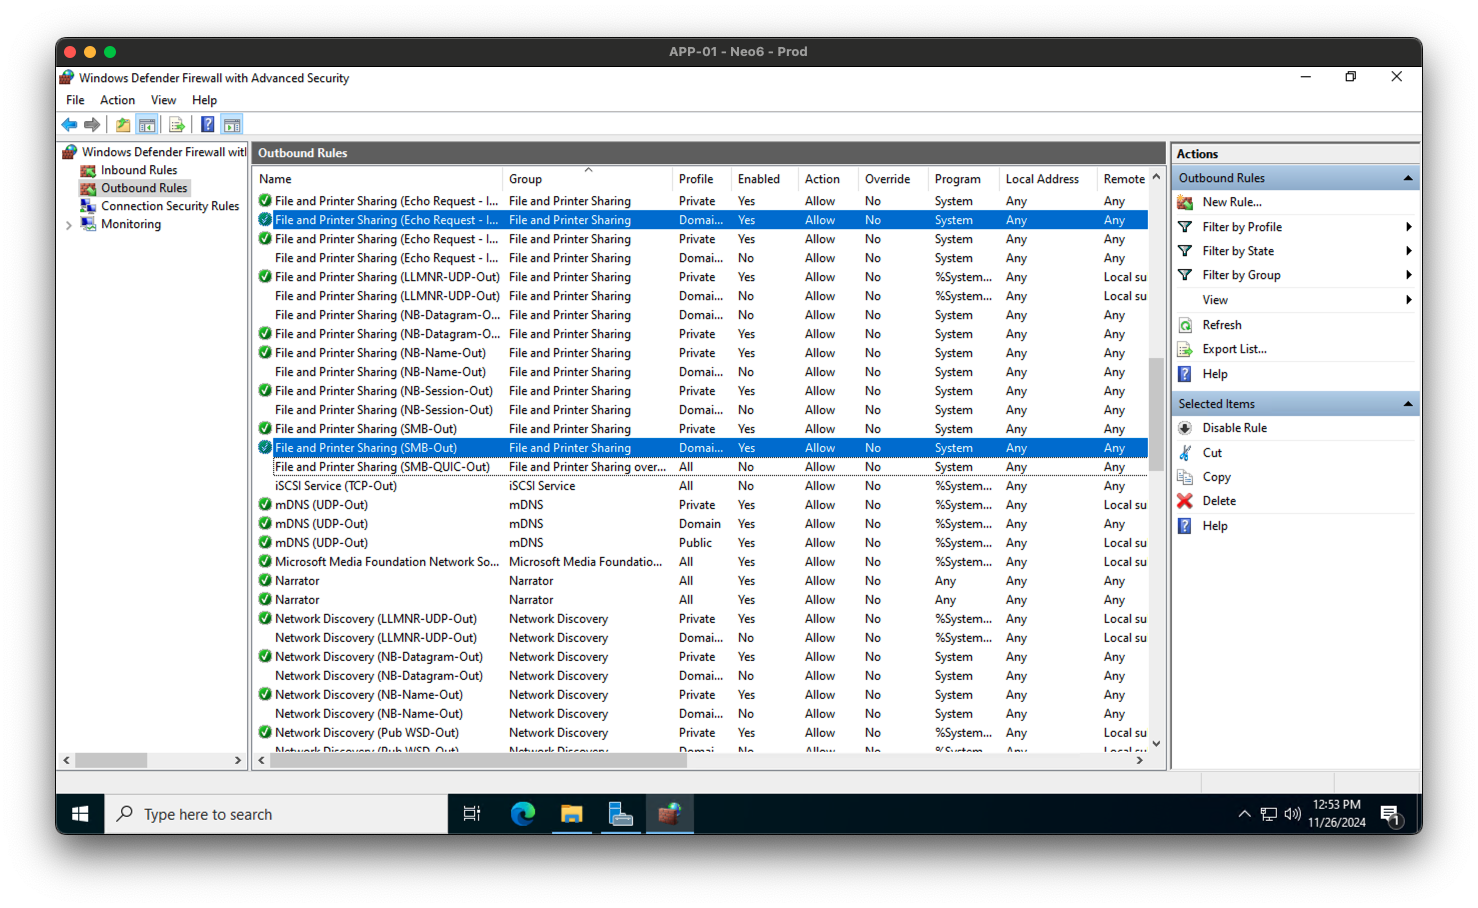
Step 3: Publish your RemoteApp Program
Now that you have Remote Desktop Services installed and your firewall configured, you can proceed to publish your RemoteApp program. Here’s how you can do it:
- Open the Server Manager on your Windows Server machine.
- Click on the Remote Desktop Services tab on the left-hand side.
- In the Remote Desktop Services window, click on the Collections tab.
- Select the collection you want to publish the RemoteApp to.
- In the RemoteApp Programs section, click on the Tasks dropdown menu and select Publish RemoteApp Programs.
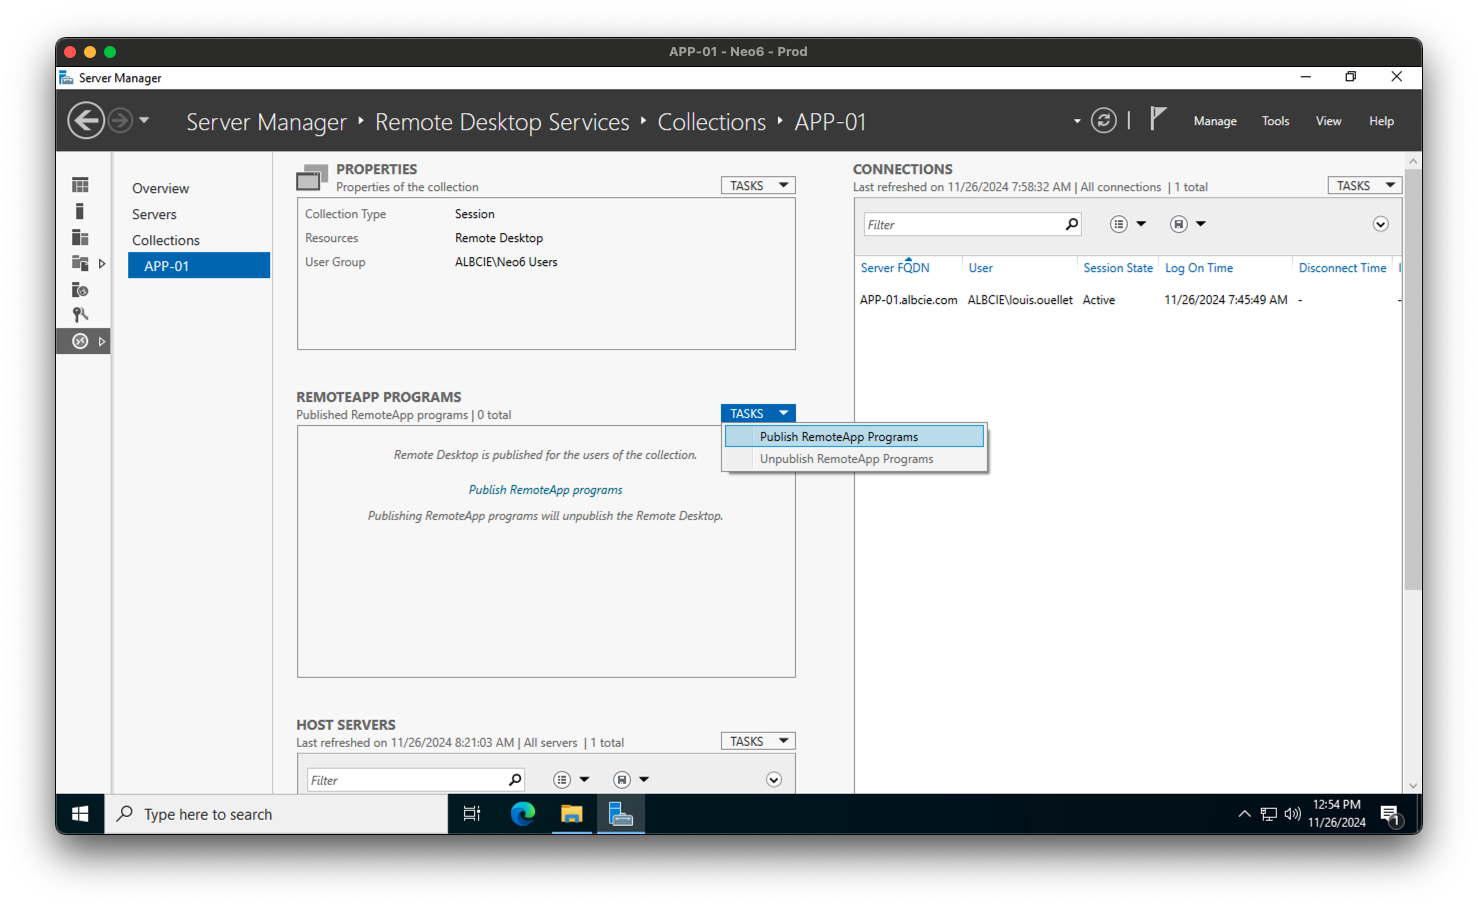
- In the Publish RemoteApp Programs Wizard, select the application you want to publish as a RemoteApp. If your application is not listed, click on the Add… button and navigate to the application’s executable file.
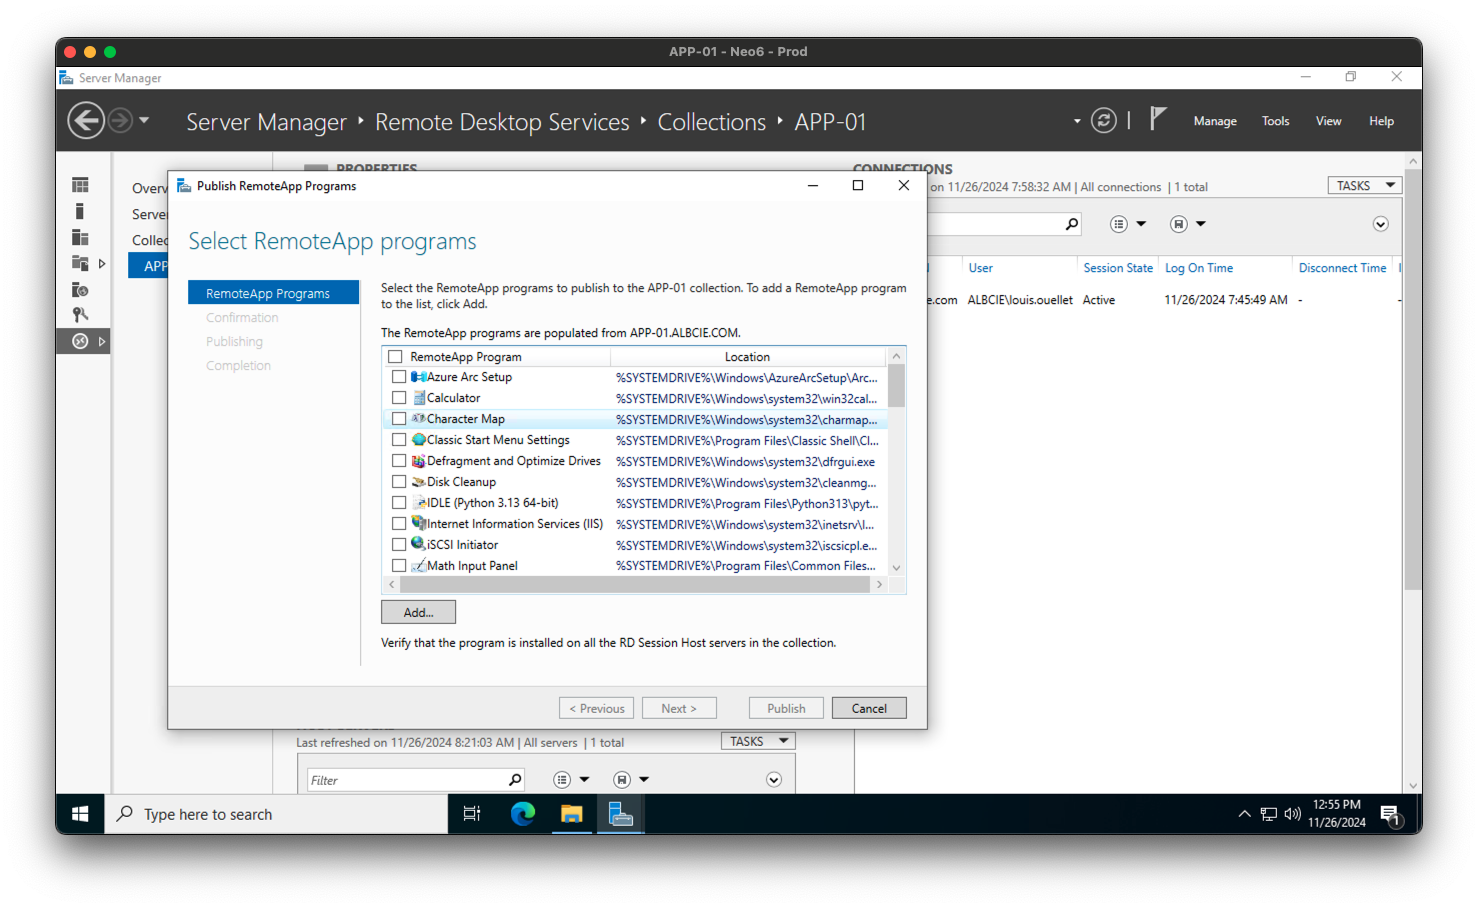
- Note that you need to use a FQDN path to the executable file. In our case, we will publish an application found on the
G:\drive. So, the path will be\\<server_name>\g$\neo_sandbox\NEO_FFW.exe.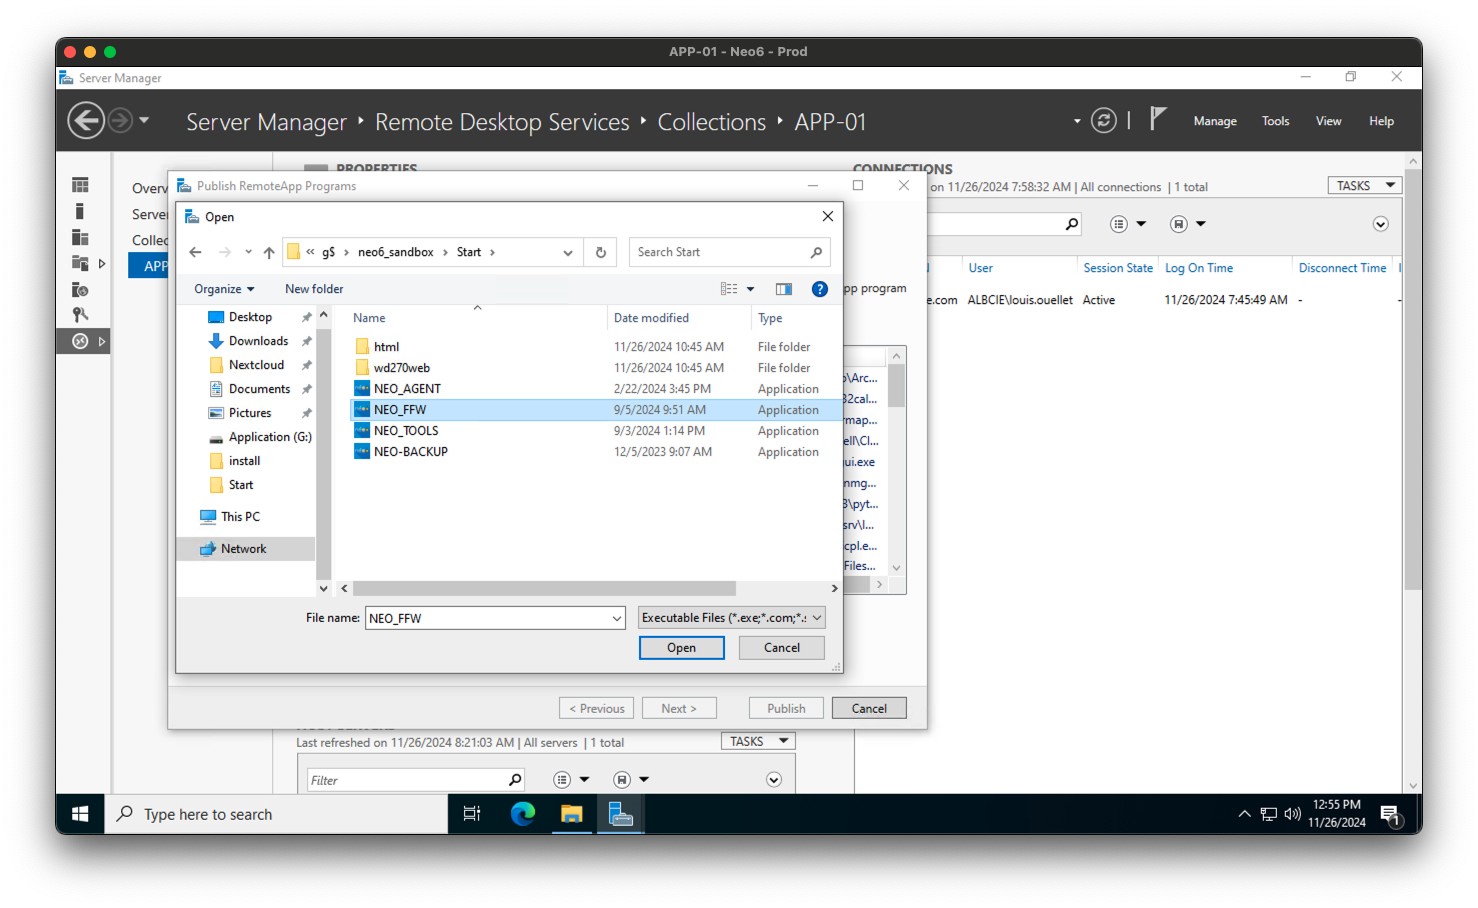
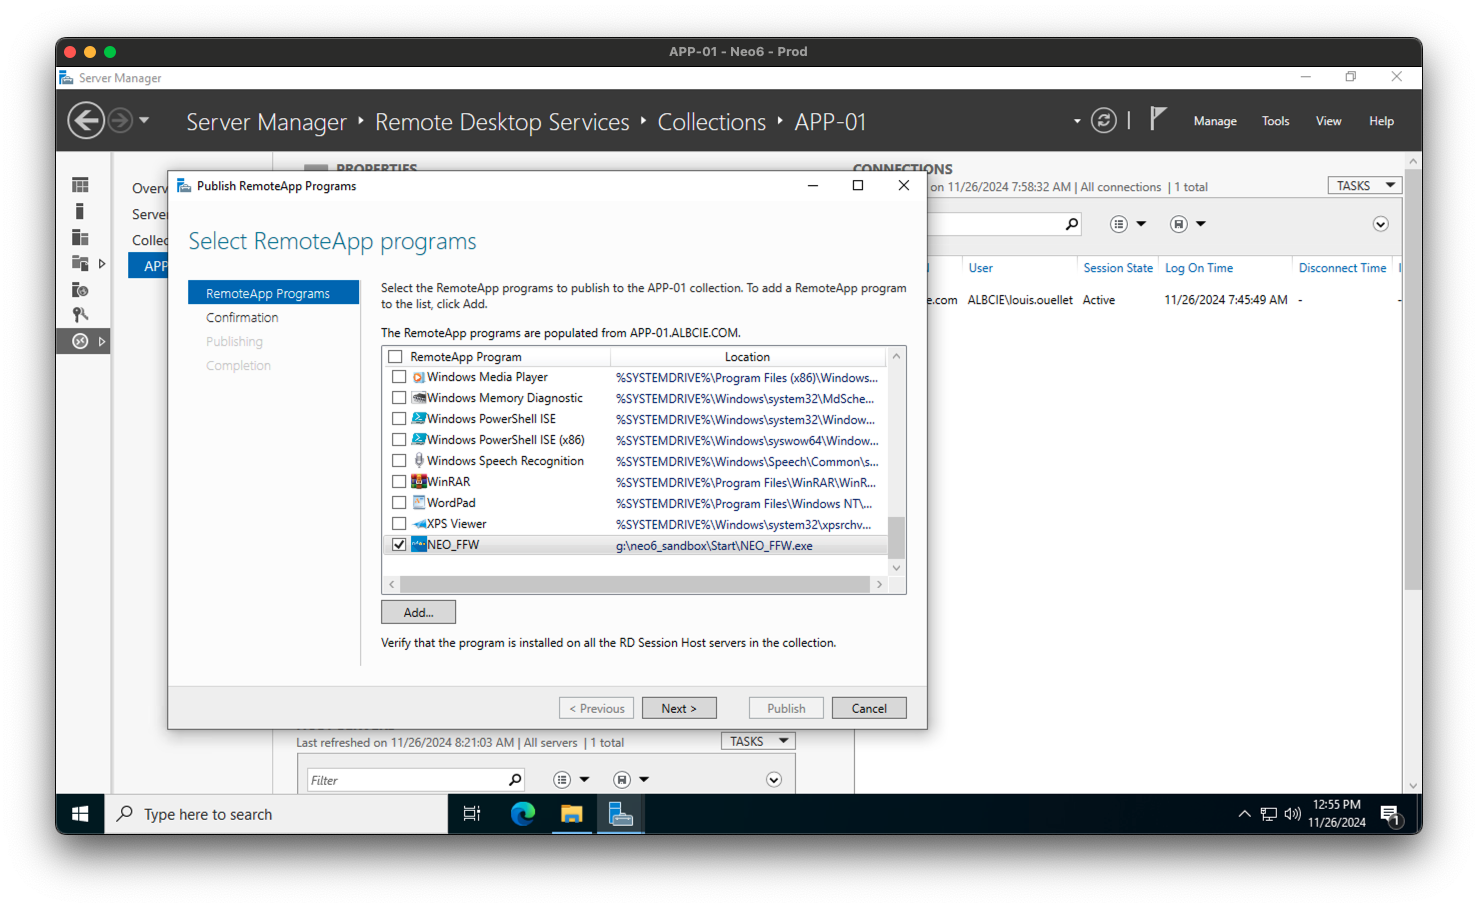
- Now select the newly added program and click on the Next button.
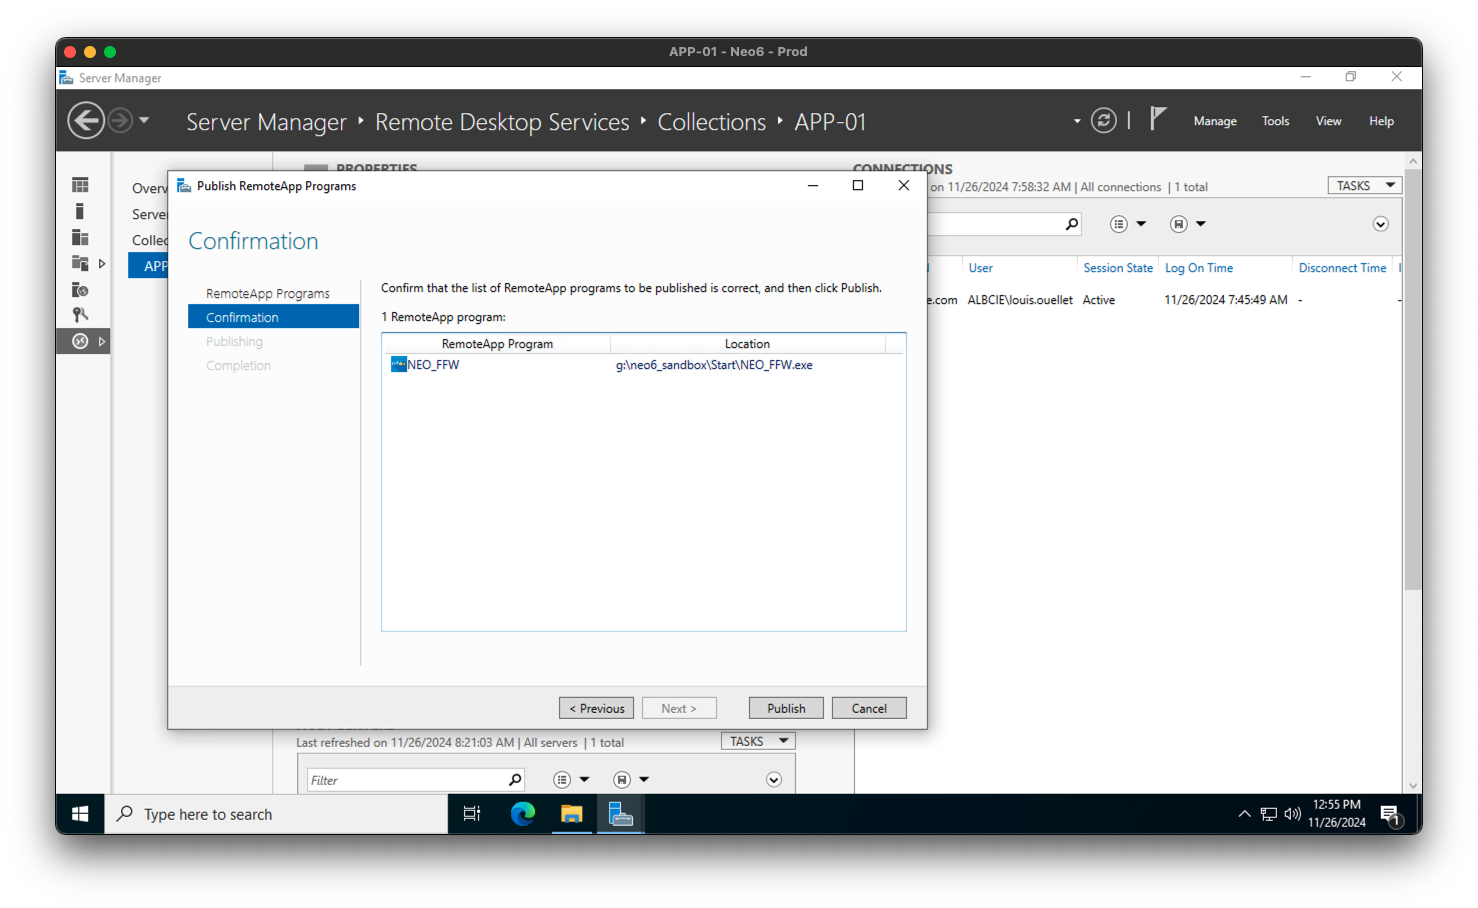
- Review the summary of the RemoteApp program you are about to publish and click on the Publish button.
- Once the RemoteApp program is published successfully, click on the Close button to close the wizard.
Step 4: Personalizing your RemoteApp Program
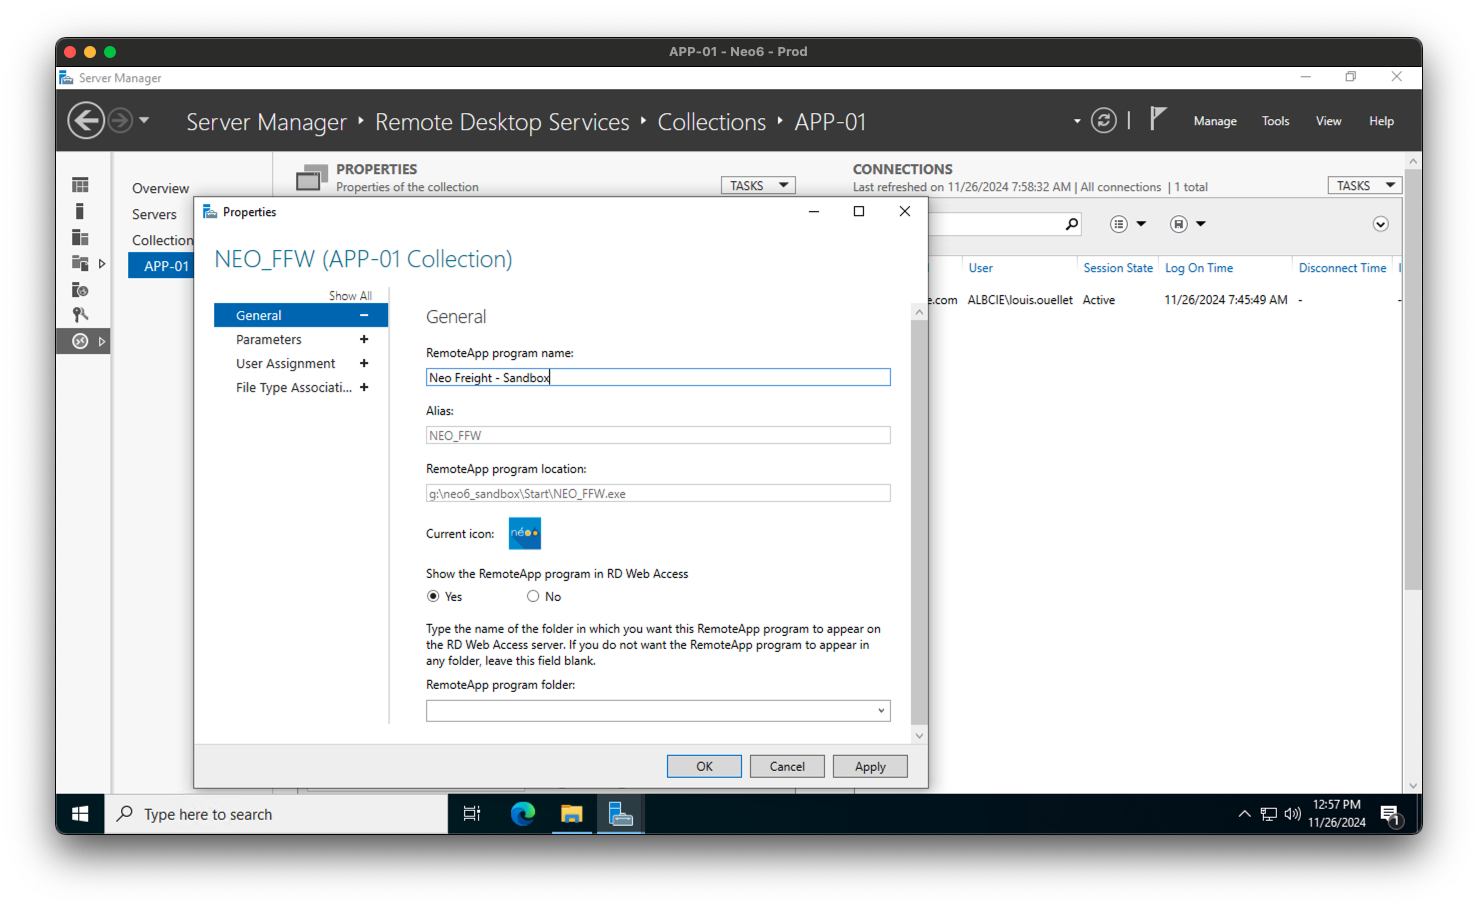
After publishing your RemoteApp program, you can personalize it by changing its display name, icon, and other settings. Here’s how you can do it:
- In the RemoteApp Programs section, you will see the RemoteApp program you published earlier. Right-click on the program and select Properties.
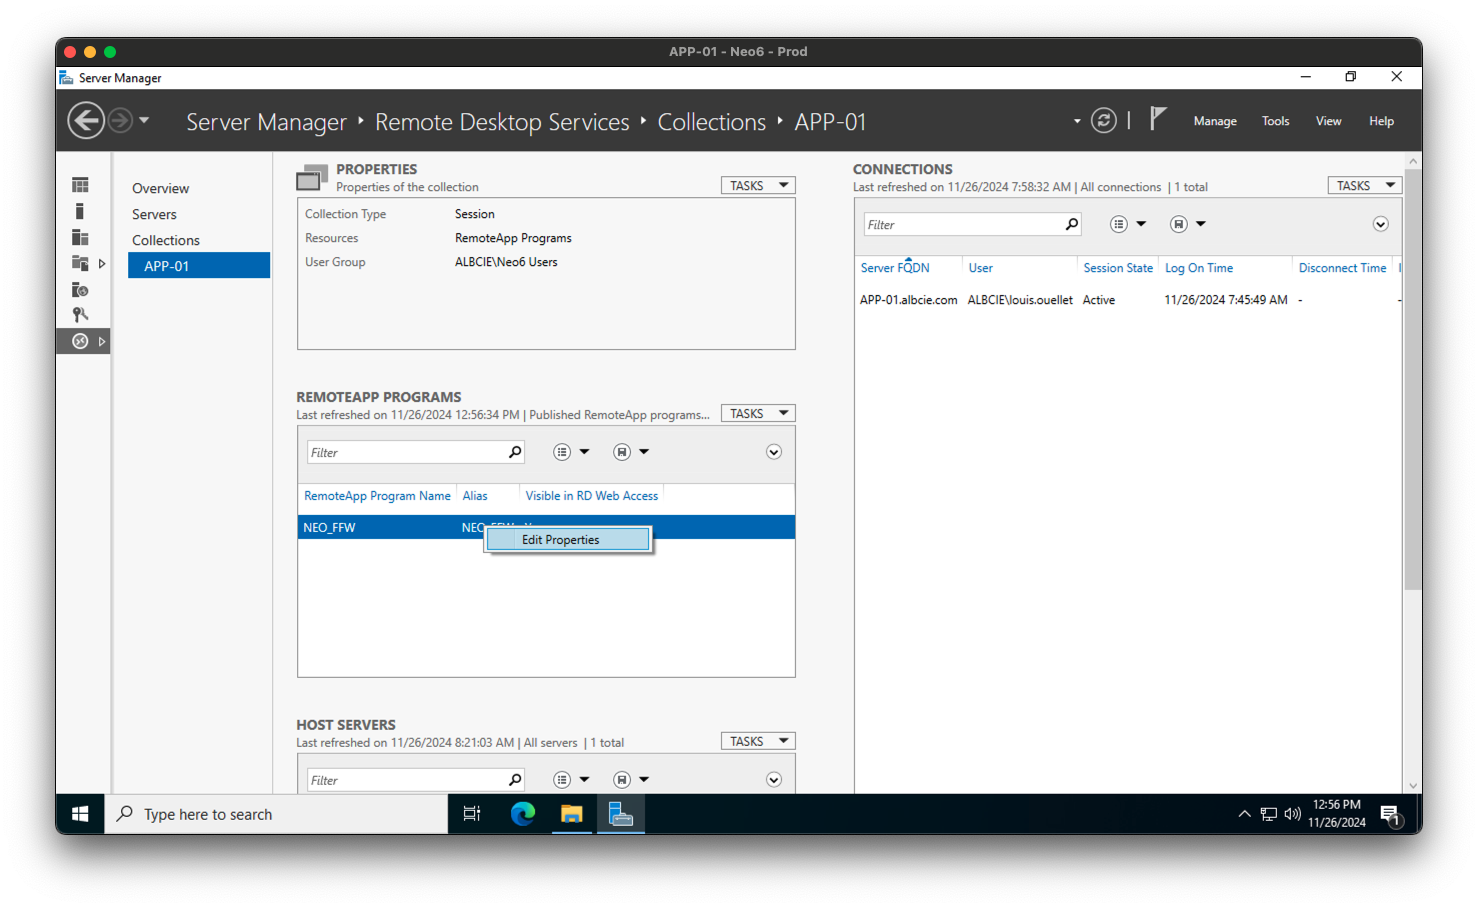
- In the Properties window, you can change the display name, icon, and other settings of the RemoteApp program. Once you are done, click on the OK button to save your changes.
Step 5: Retrieve your RemoteApp Program
Now that you have published and personalized your RemoteApp program, you can retrieve it on the RD Web Access portal. Here’s how you can do it:
- Open a web browser on your client machine and navigate to the RD Web Access portal URL. The URL will be in the format
https://<server_name>/RDWeb.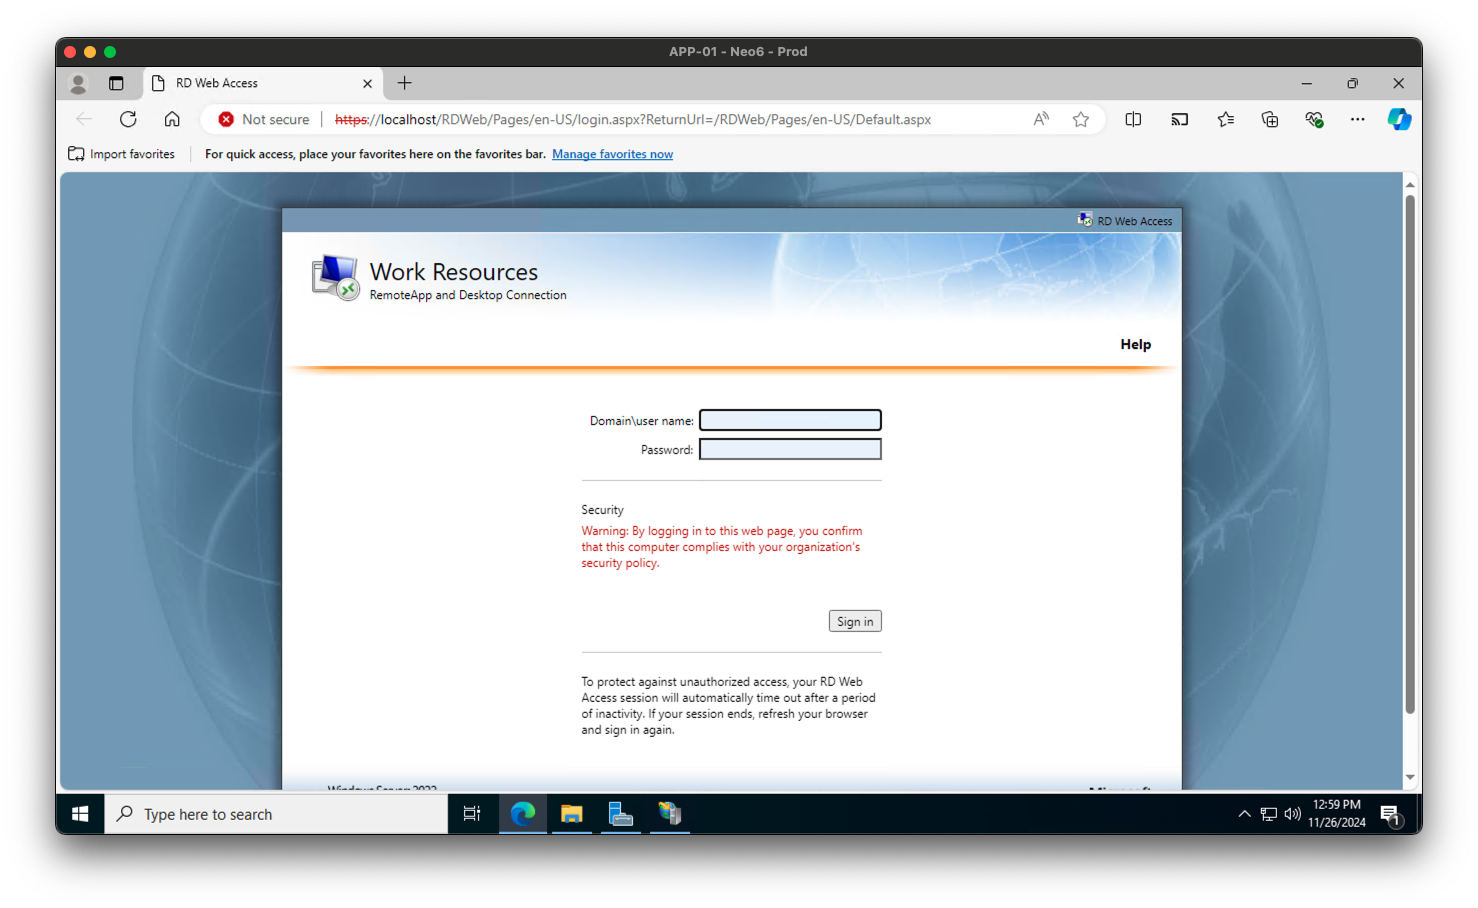
- Log in using your credentials.
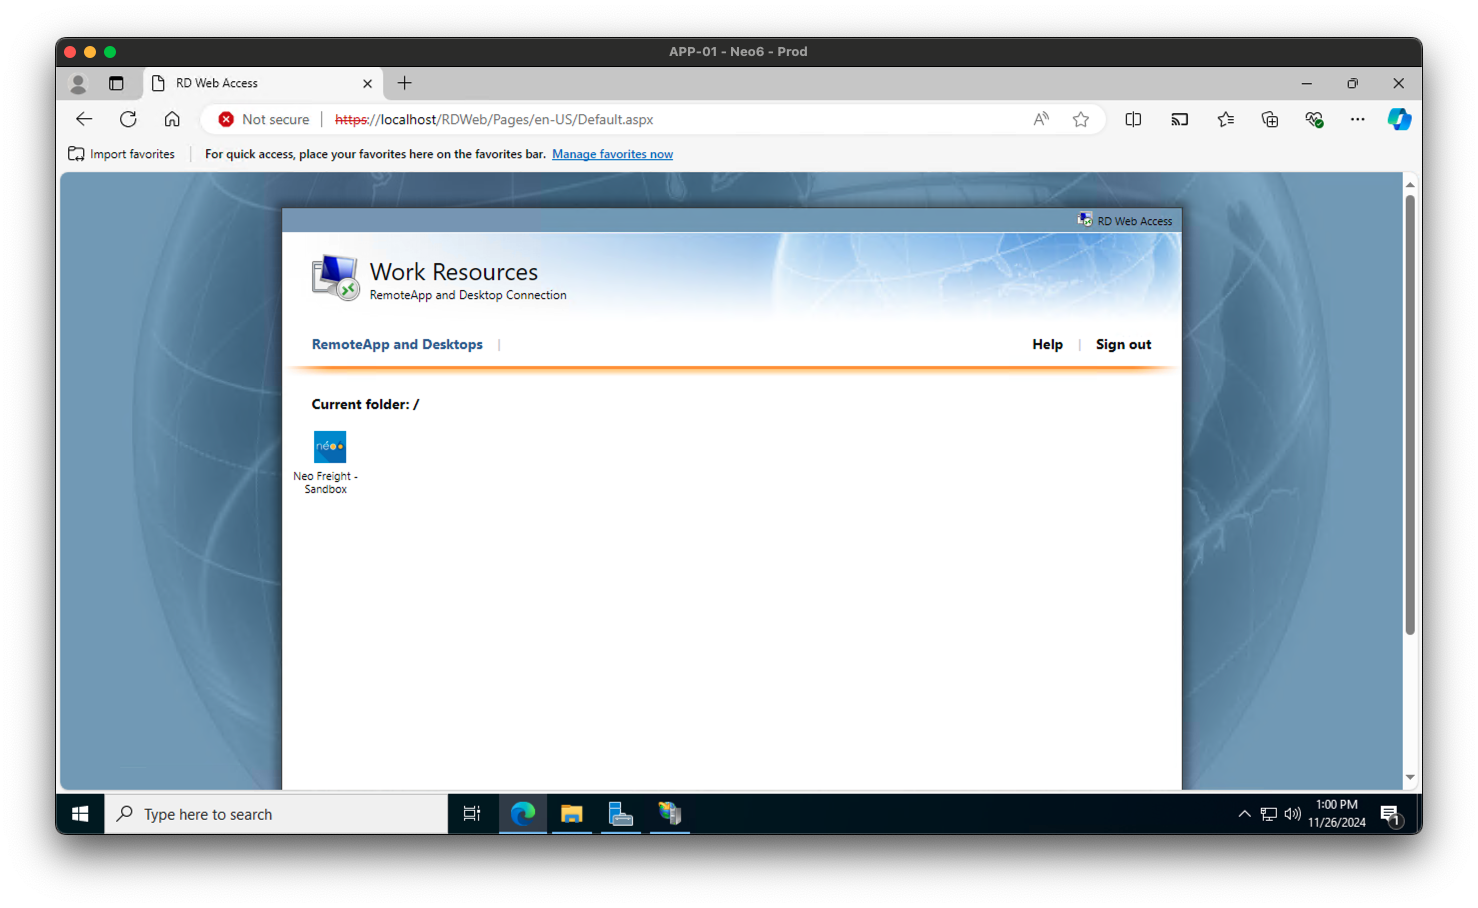
- In the RemoteApp Programs section, you will see the RemoteApp program you published earlier. Click on the program to download and launch it on your client machine.
Conclusion
In this guide, we walked you through the process of publishing a RemoteApp using Windows Server Remote Desktop Services. By following the steps outlined in this article, you can centralize application management and provide users with secure and efficient access to their work tools. Whether you are setting up RDS for the first time or looking to fine-tune your deployment, this guide will help you get started with RemoteApp publishing. We hope you found this article helpful and informative. If you have any questions or feedback, feel free to leave a comment below. Good luck with your RemoteApp deployment!
Tags
