Table of Contents

How to Setup Server Backups on Windows Server 2022
Author(s): Louis Ouellet
Backups are an essential part of any server management strategy. They provide a way to recover data and system configurations in case of data loss or system failure. In this guide, we will be setting up server backups on Windows Server 2022. This will allow you to create regular backups of your server's data and system state, which can be used to restore the server in case of data loss or system failure.
In this guide, we will be setting up server backups on Windows Server 2022. This will allow you to create regular backups of your server's data and system state, which can be used to restore the server in case of data loss or system failure.
Prerequisites
- A server running Windows Server 2022
- A user account with administrative privileges
- A network share to store the backups
Step 1: Install Windows Server Backup Feature
- Open Server Manager by clicking on the and selecting Server Manager.
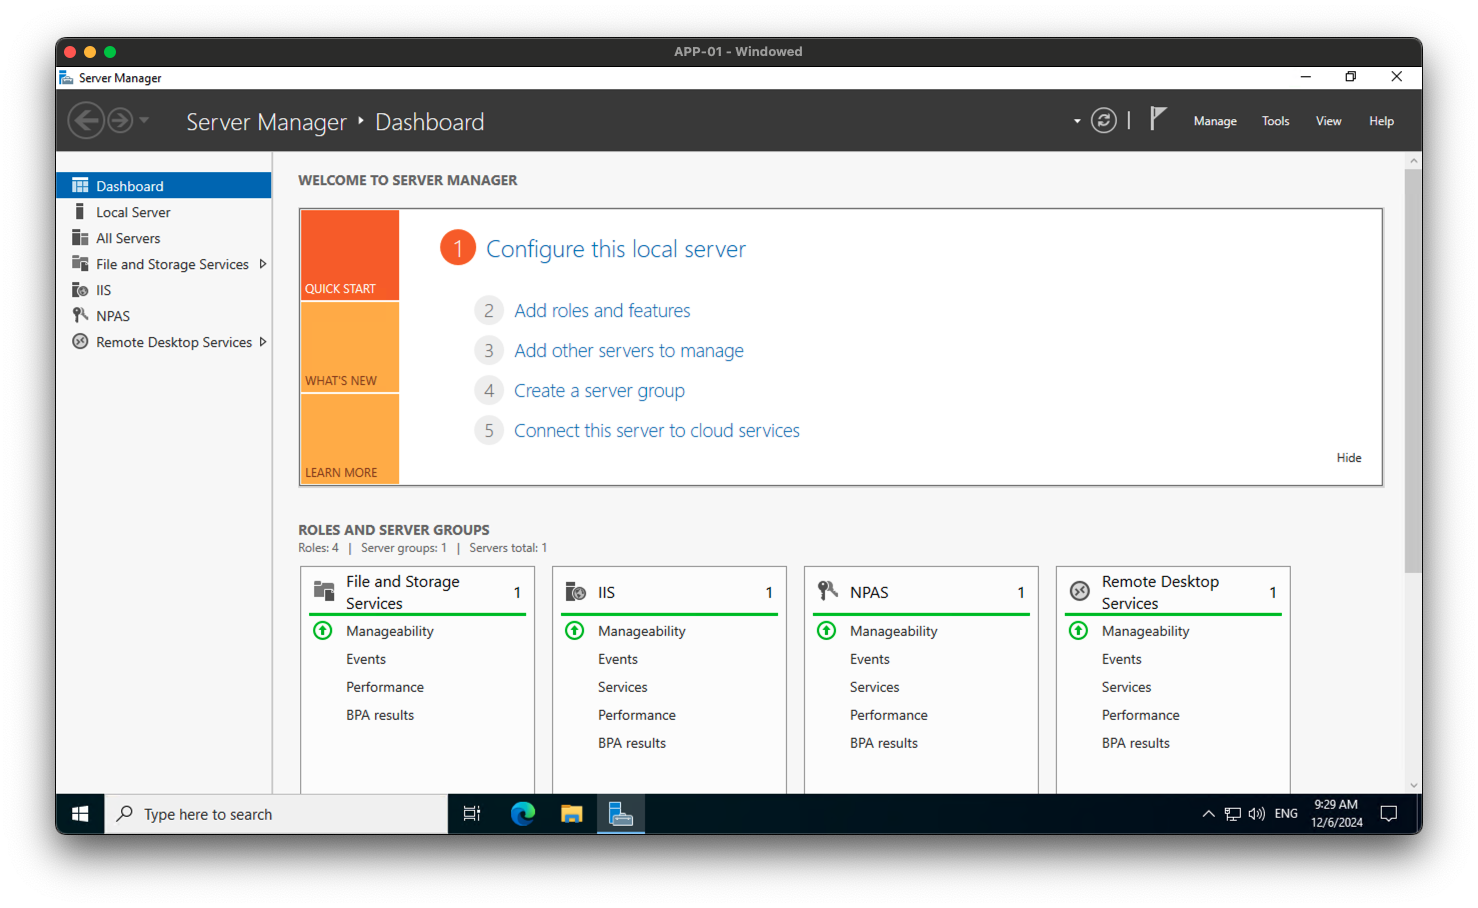
- In the Server Manager window, click on
Managein the top-right corner and selectAdd Roles and Features. - Select
Role-based or feature-based installationand click Next.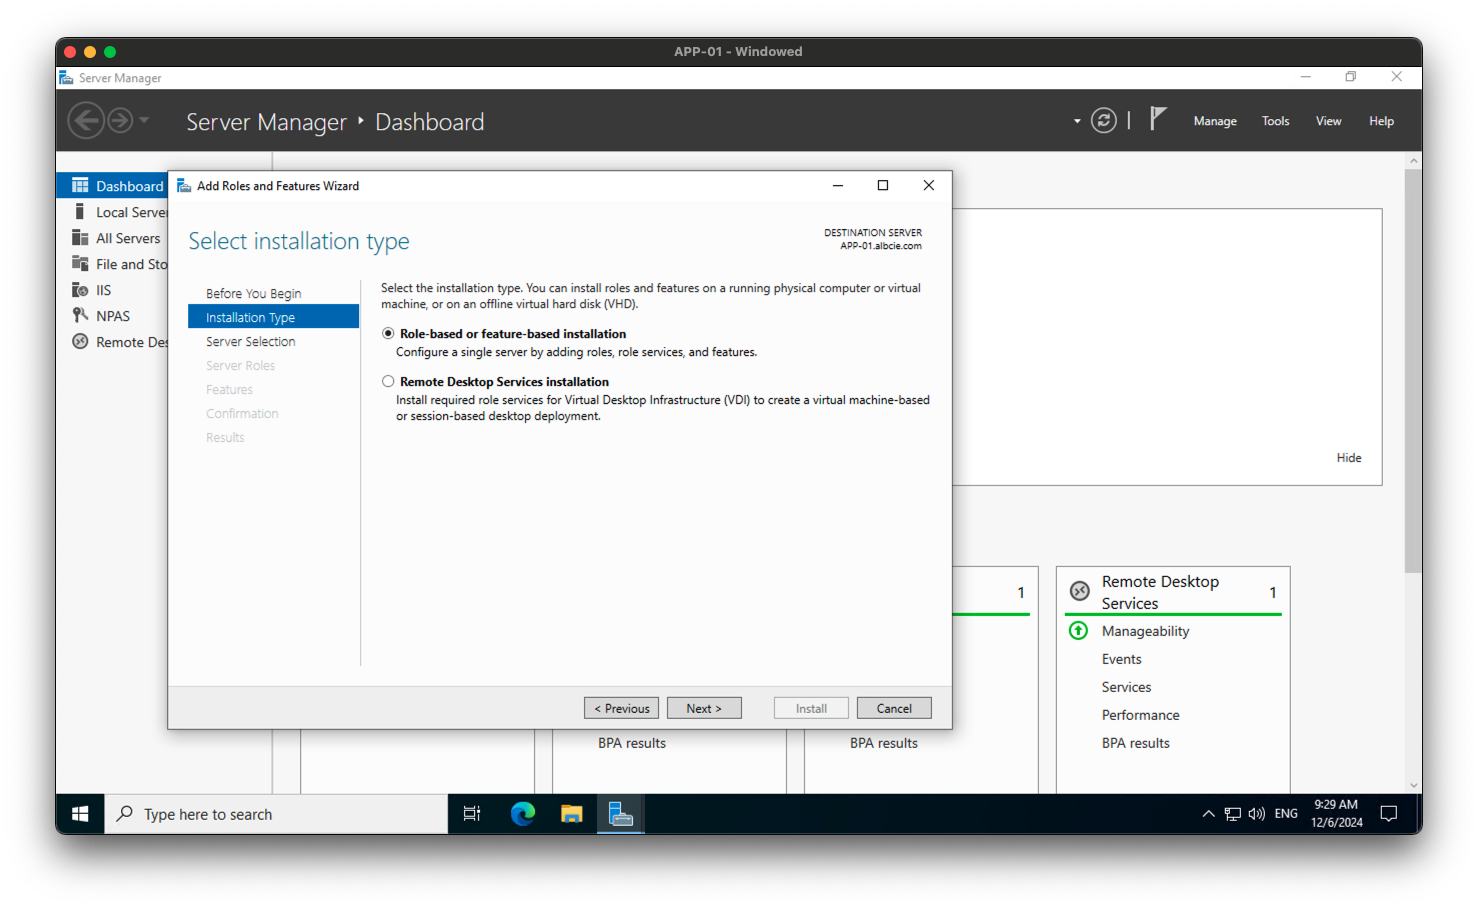
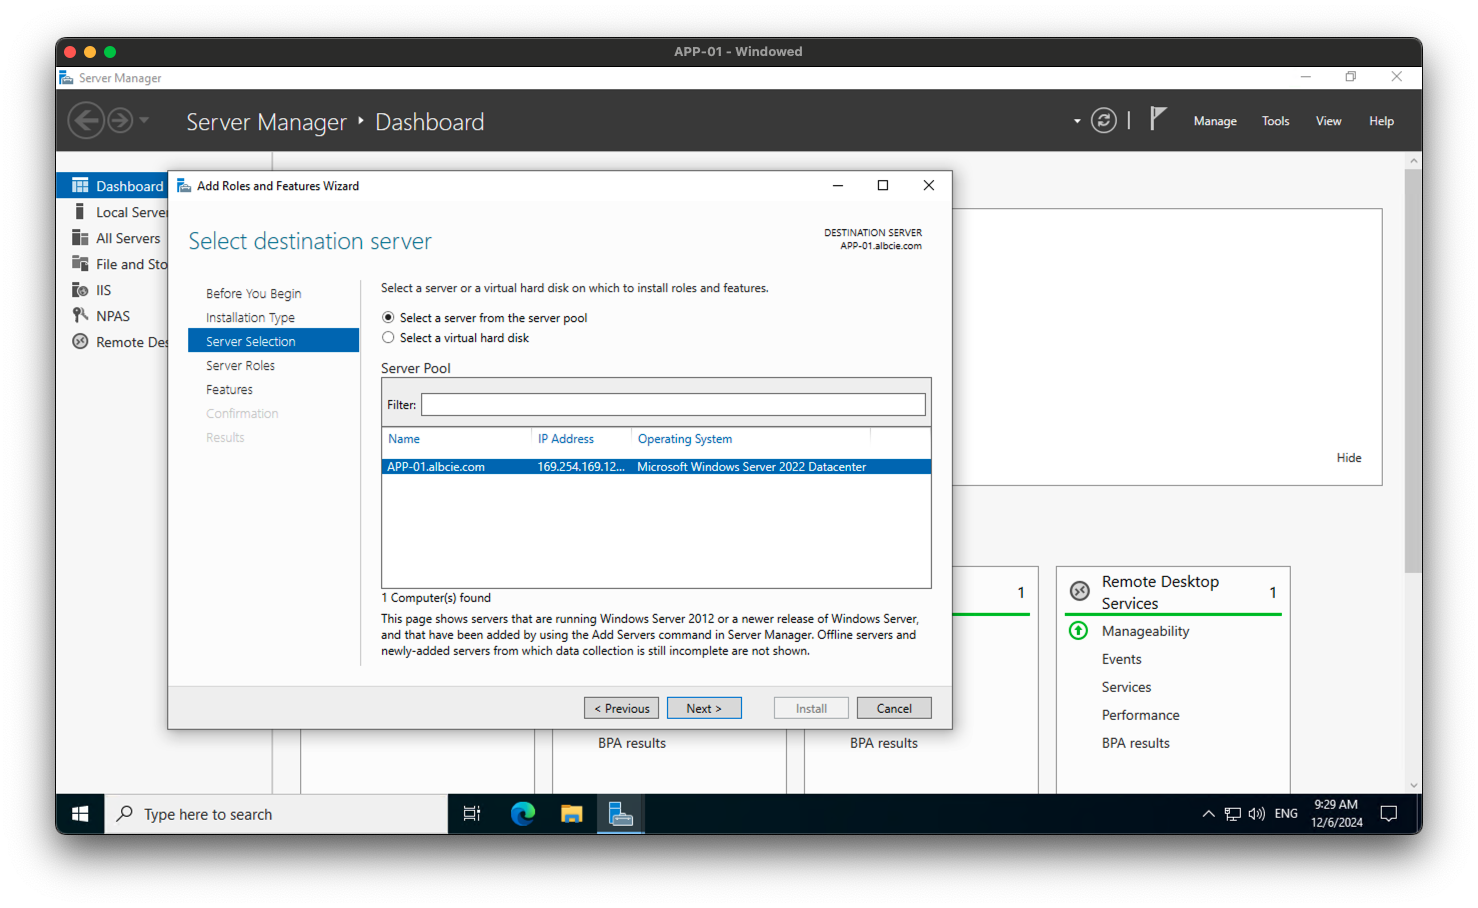
- Select the server you want to install the feature on and click Next.
- In the Server Roles window, click Next.
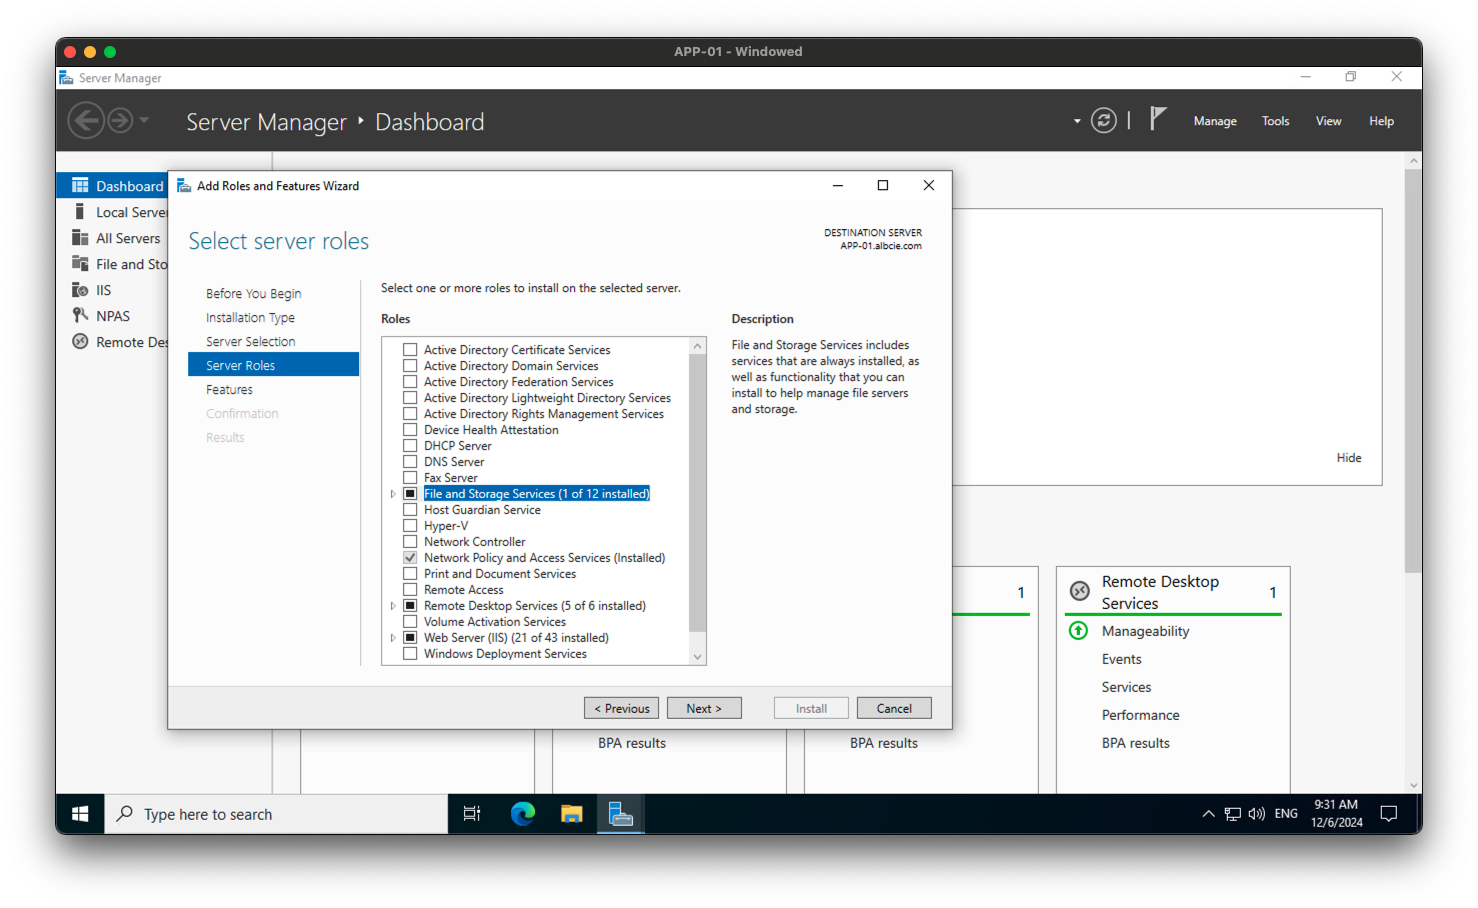
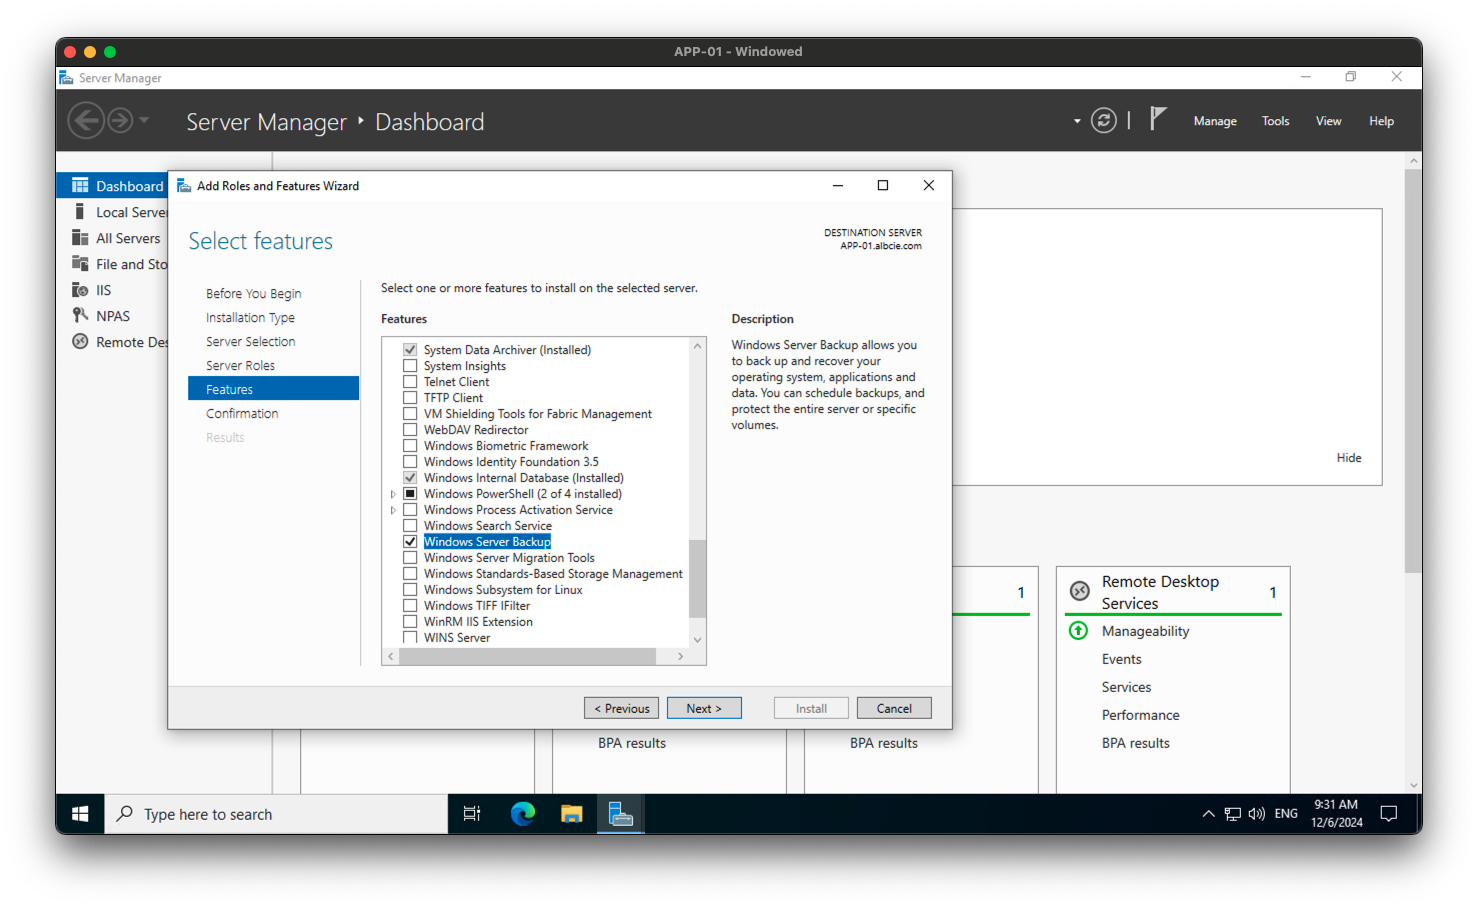
- In the Features window, scroll down and select Windows Server Backup. Click Next.
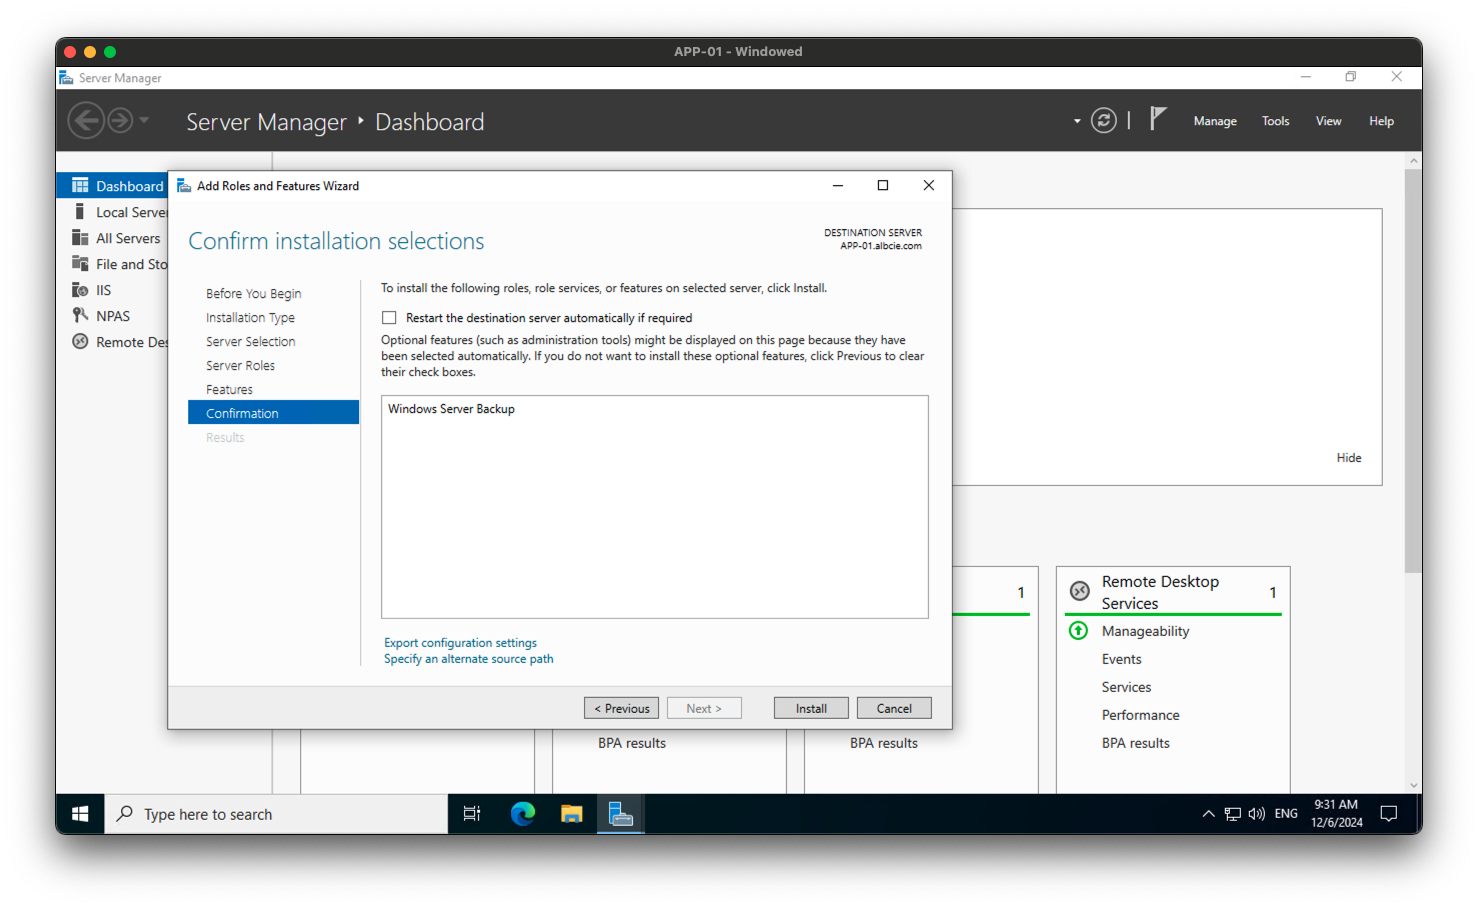
- Click Install to begin the installation process.
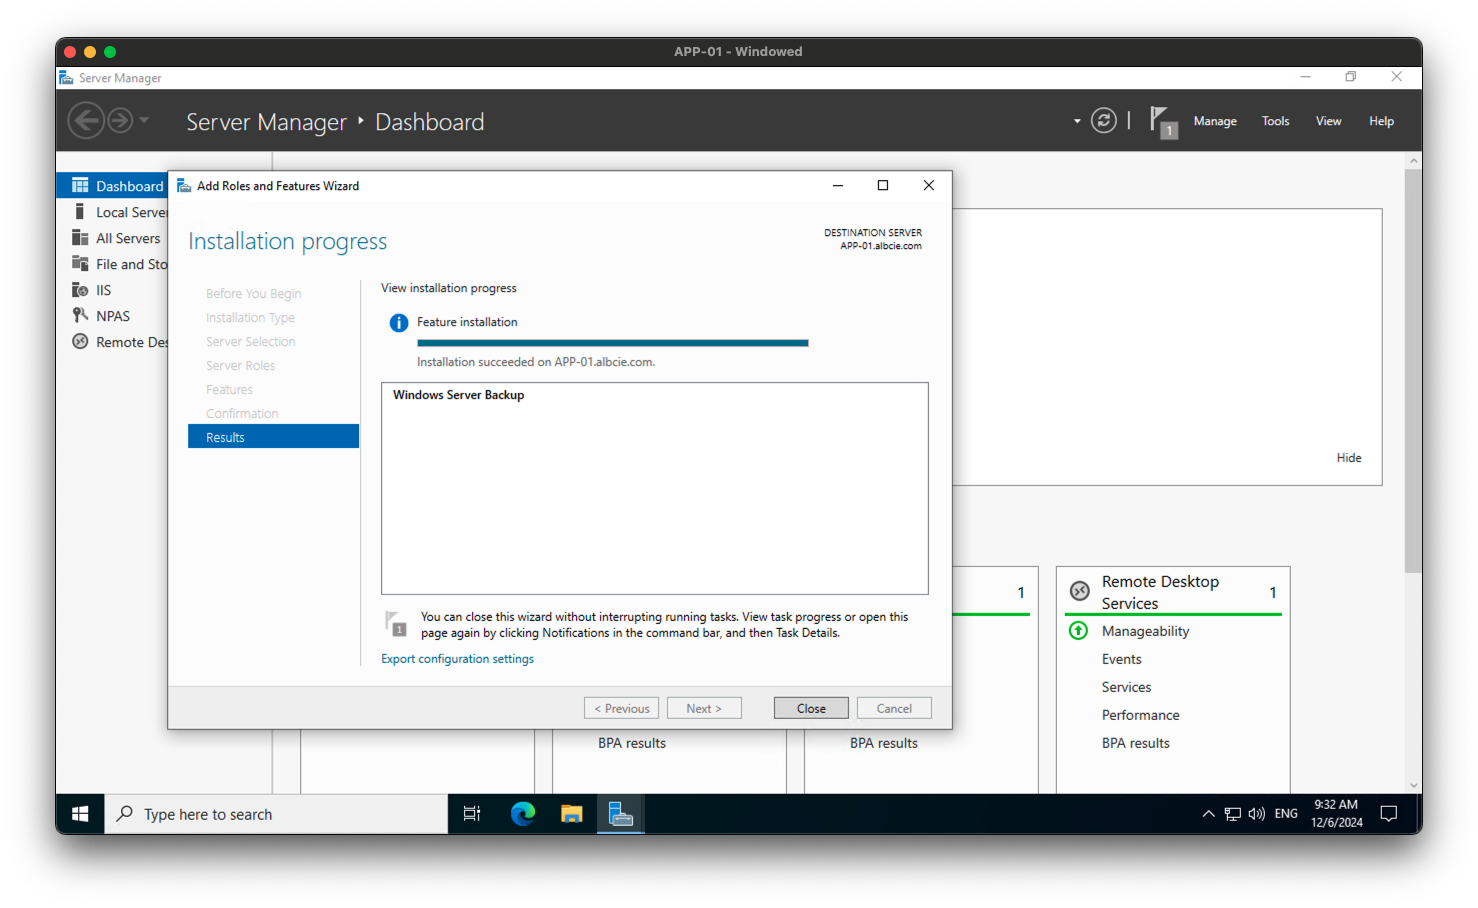
- Once the installation is complete, click Close.
Step 2: Configure Windows Server Backup
- Open Server Manager by clicking on the and selecting Server Manager.
- In the Server Manager window, click on
Toolsin the top-right corner and selectWindows Server Backup.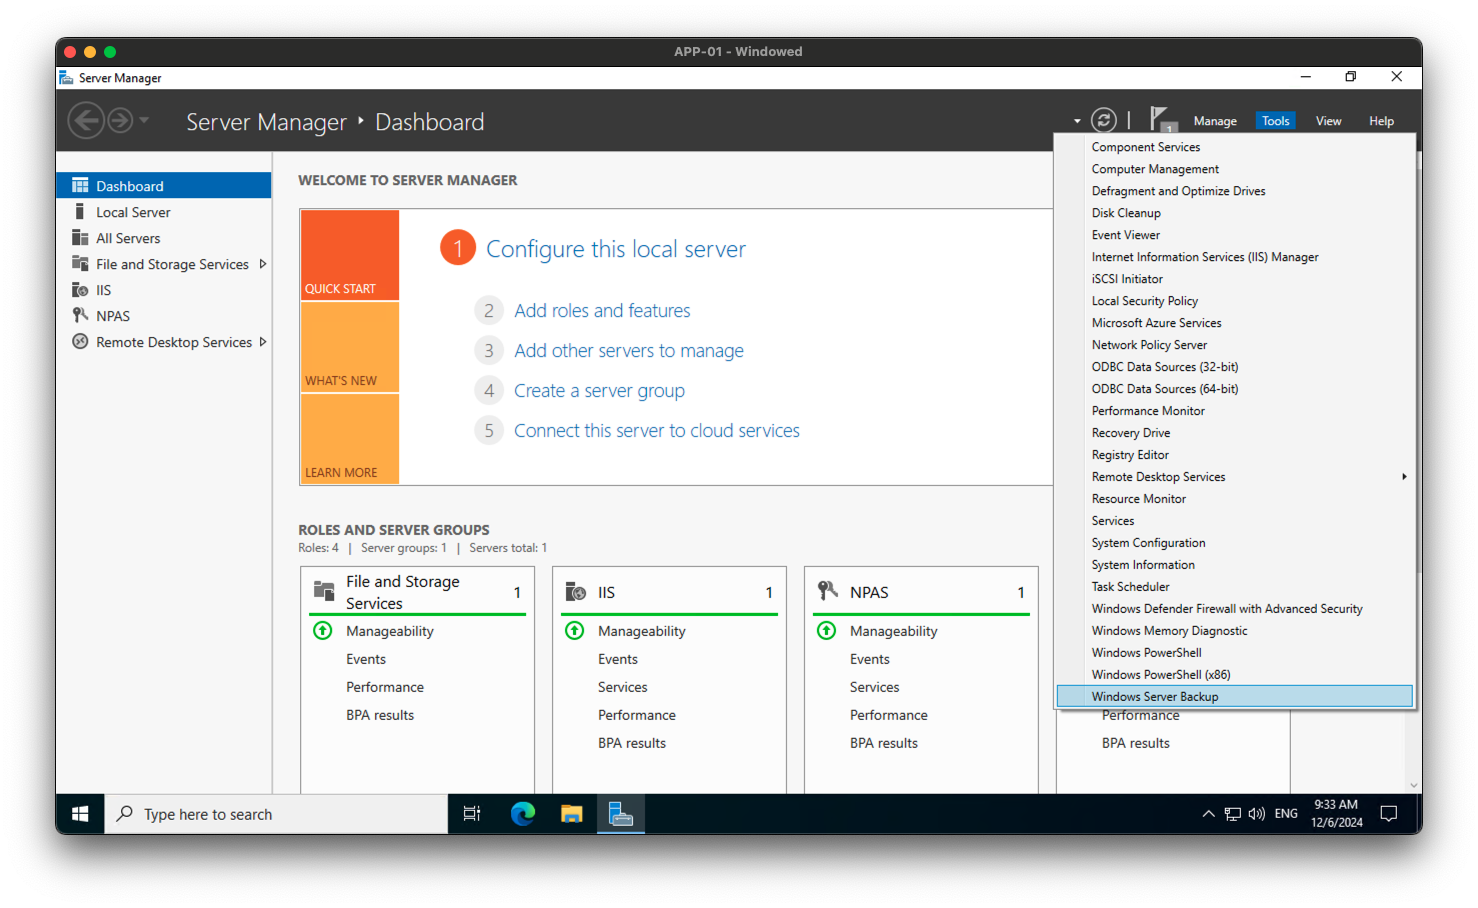
- In the Windows Server Backup window, click on
Local Backupin the left pane.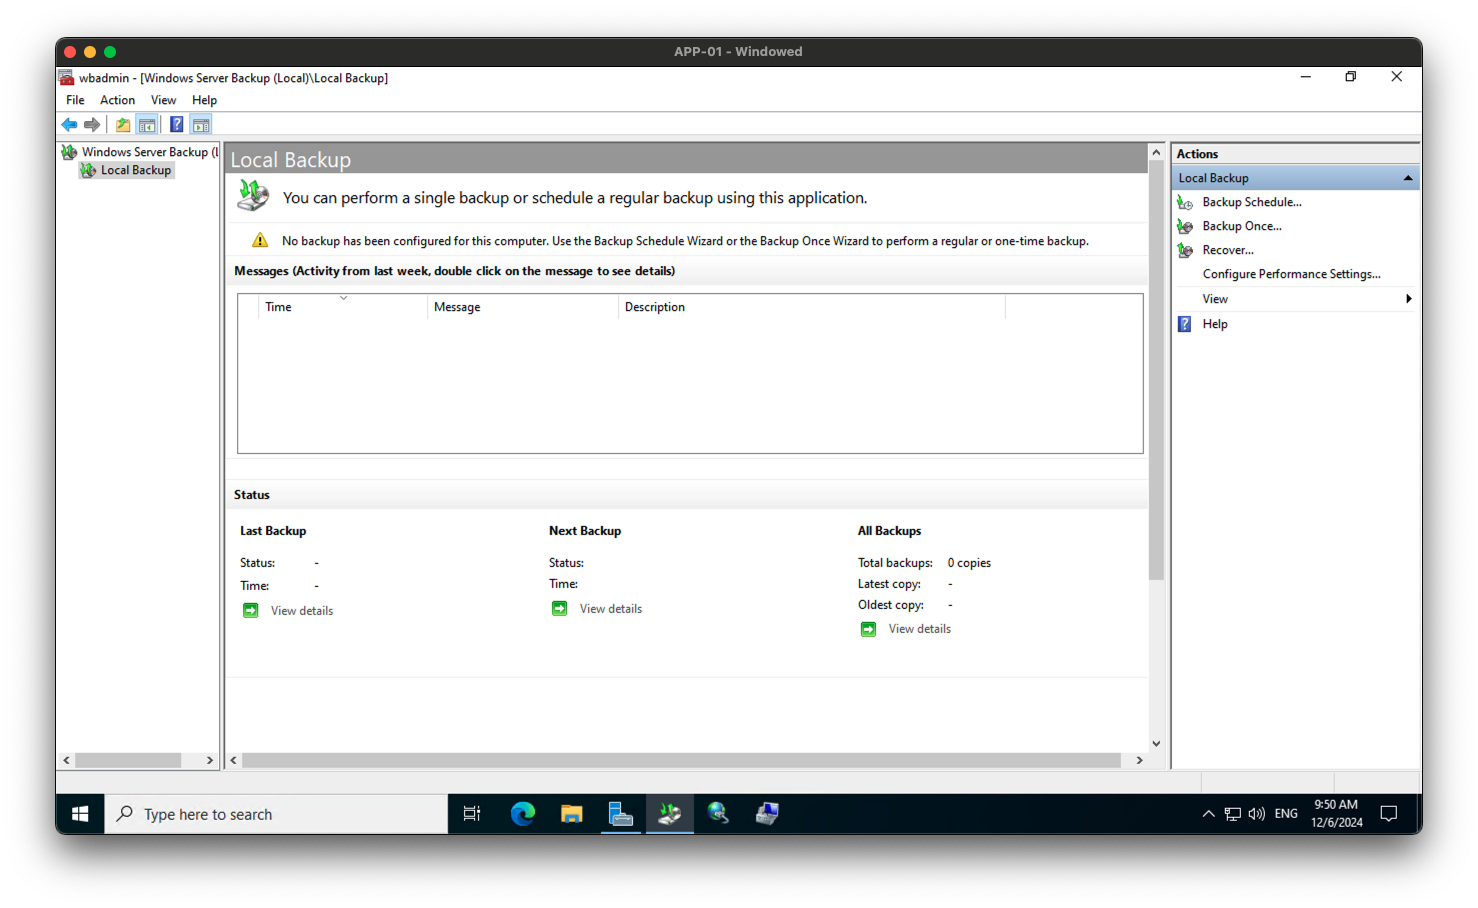
- Click on
Backup Schedulein the right pane. - In the Backup Schedule Wizard, click Next.
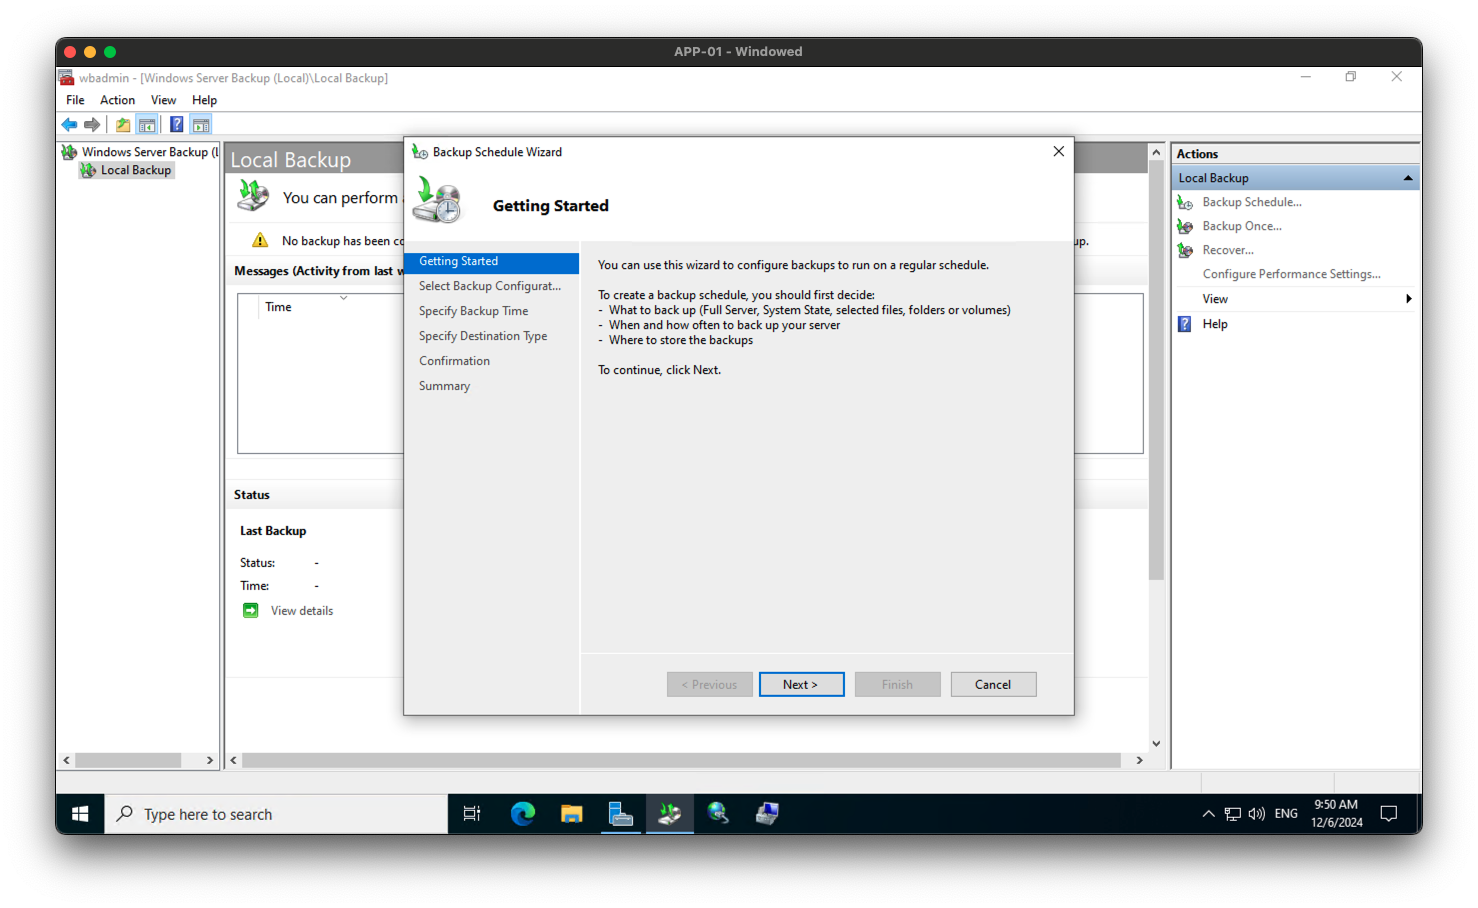
- In the Backup Schedule Wizard, select
Customand click Next.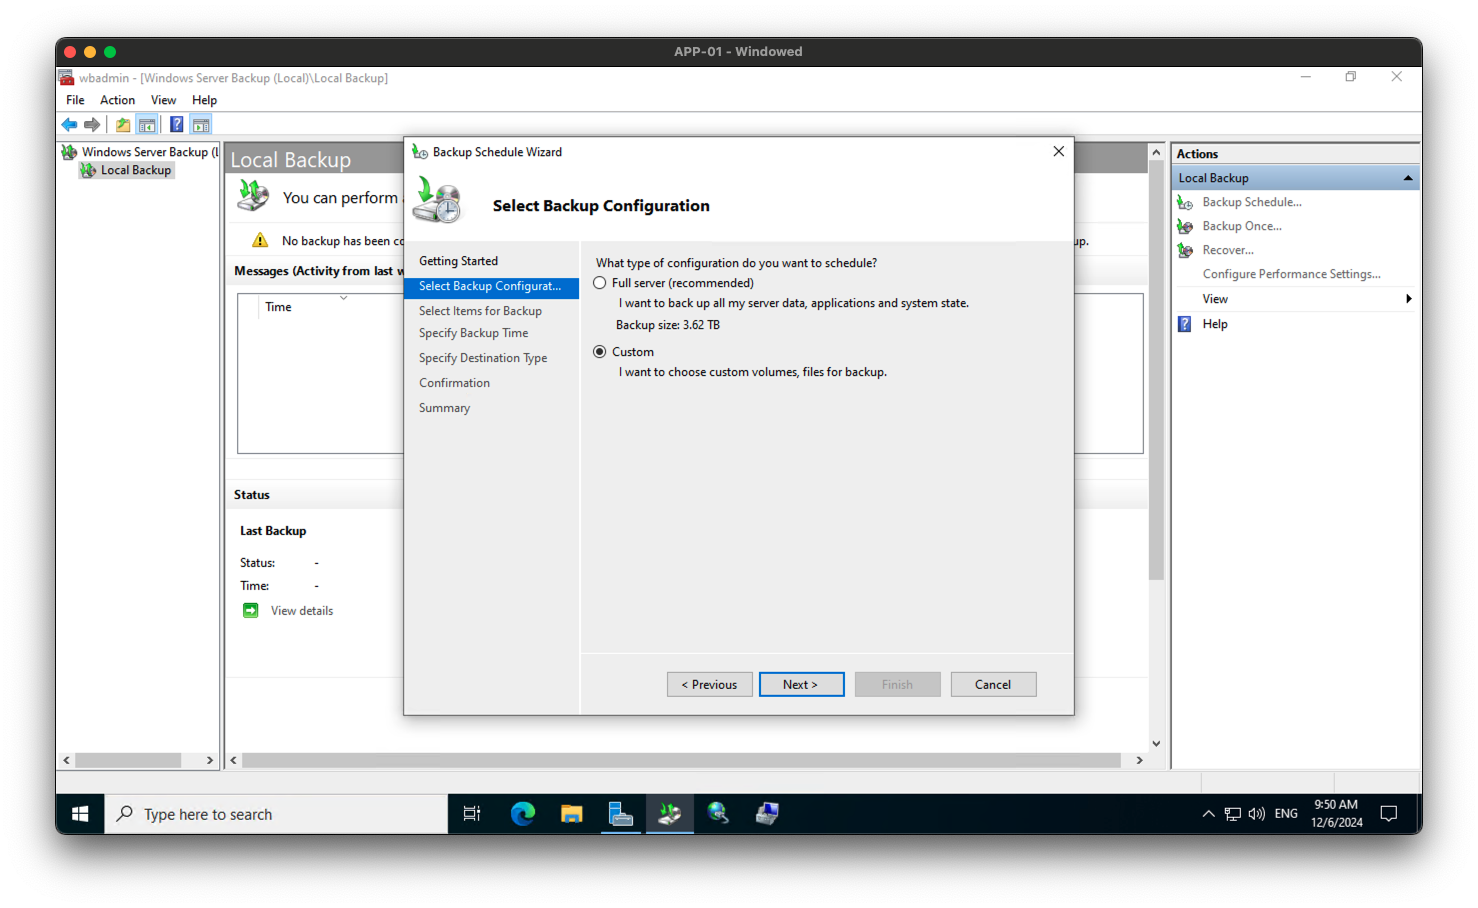
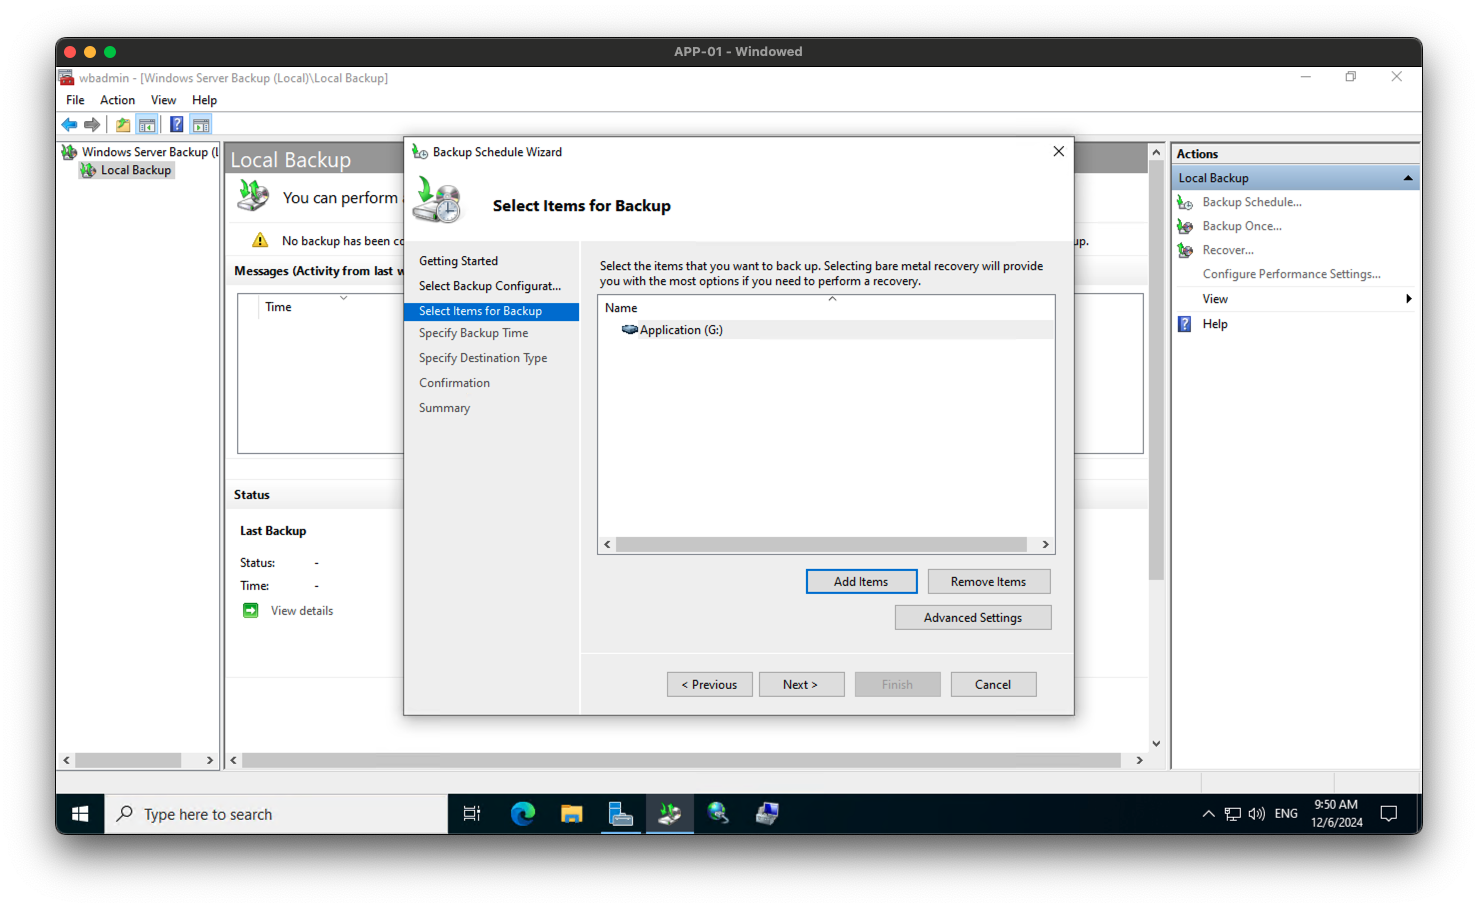
- In the Backup Schedule Wizard, select the items you want to back up by pressing Add.
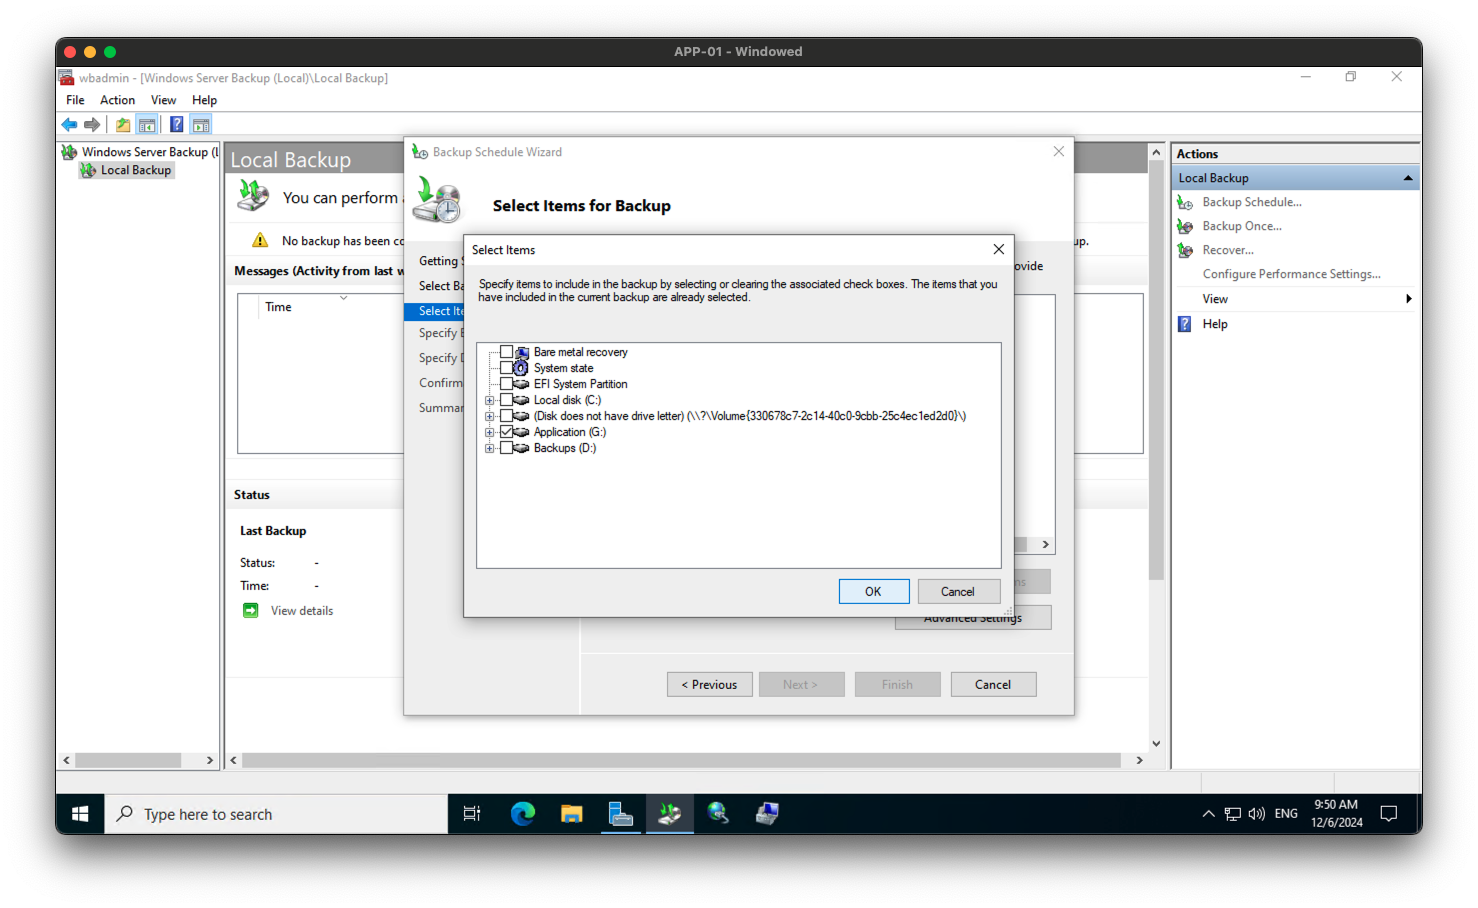
- In the Backup Schedule Wizard, click Next.
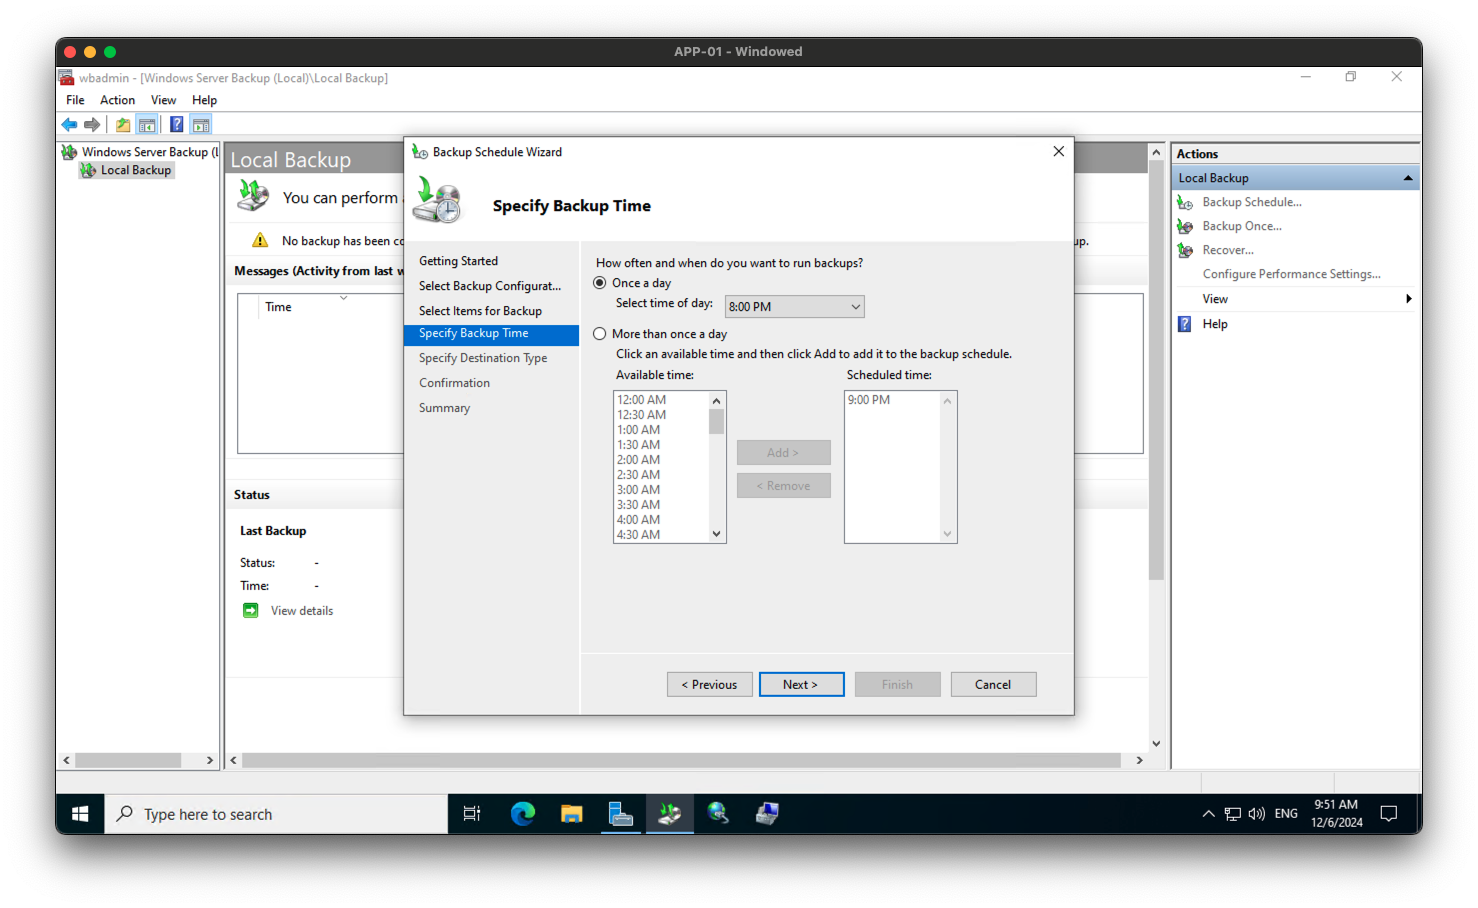
- In the Backup Schedule Wizard, select the time and day you want to run the backup and click Next.
- In the Backup Schedule Wizard, select the destination
Back up to a shared network folderfor the backup and click Next.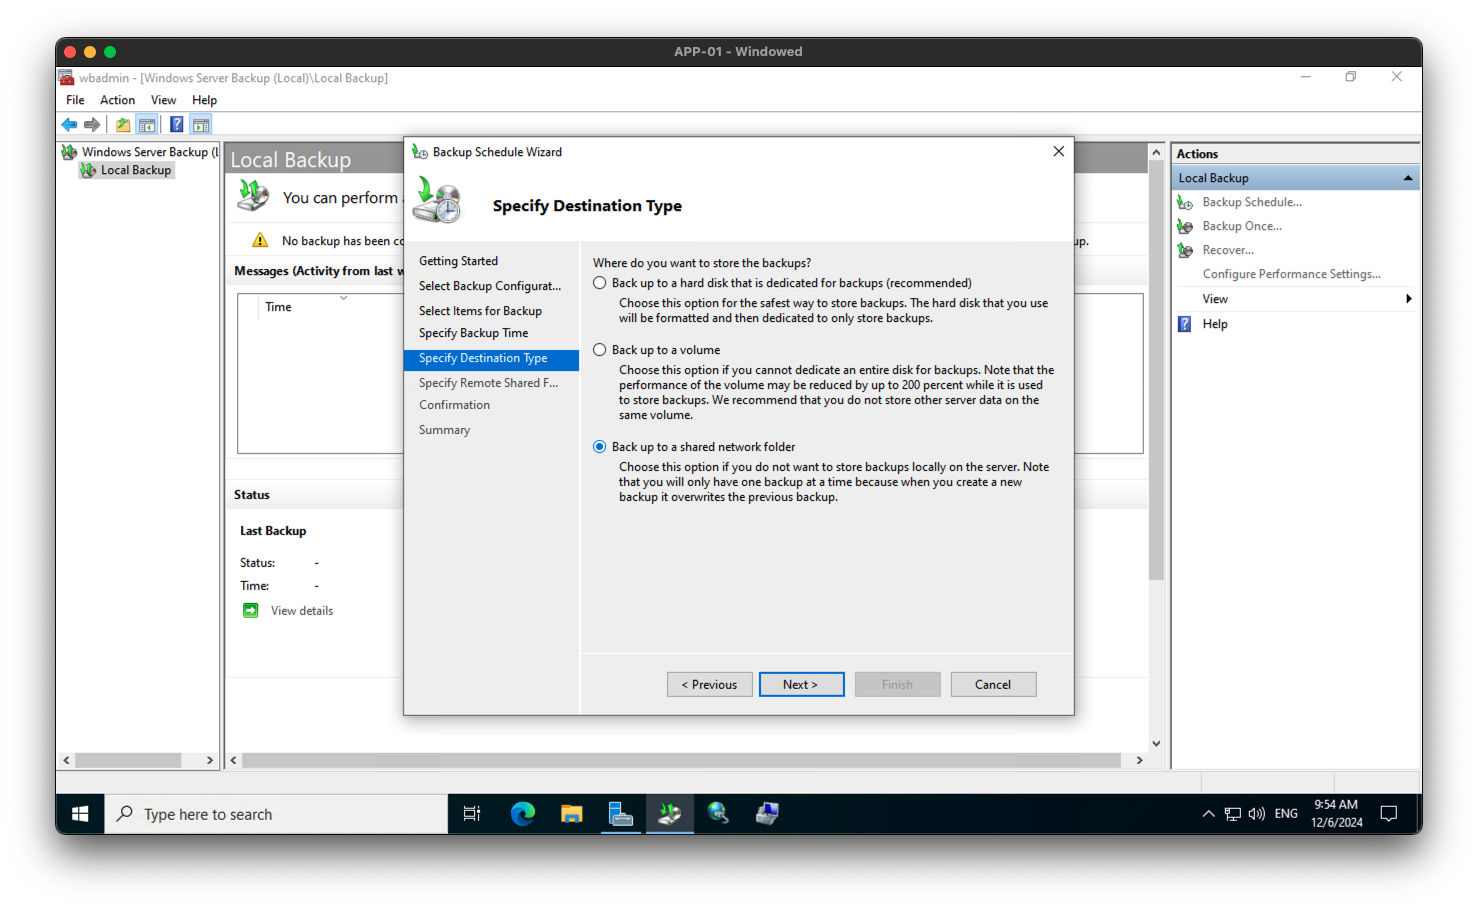
- In the Backup Schedule Wizard, enter the network path to the shared folder and click Next.
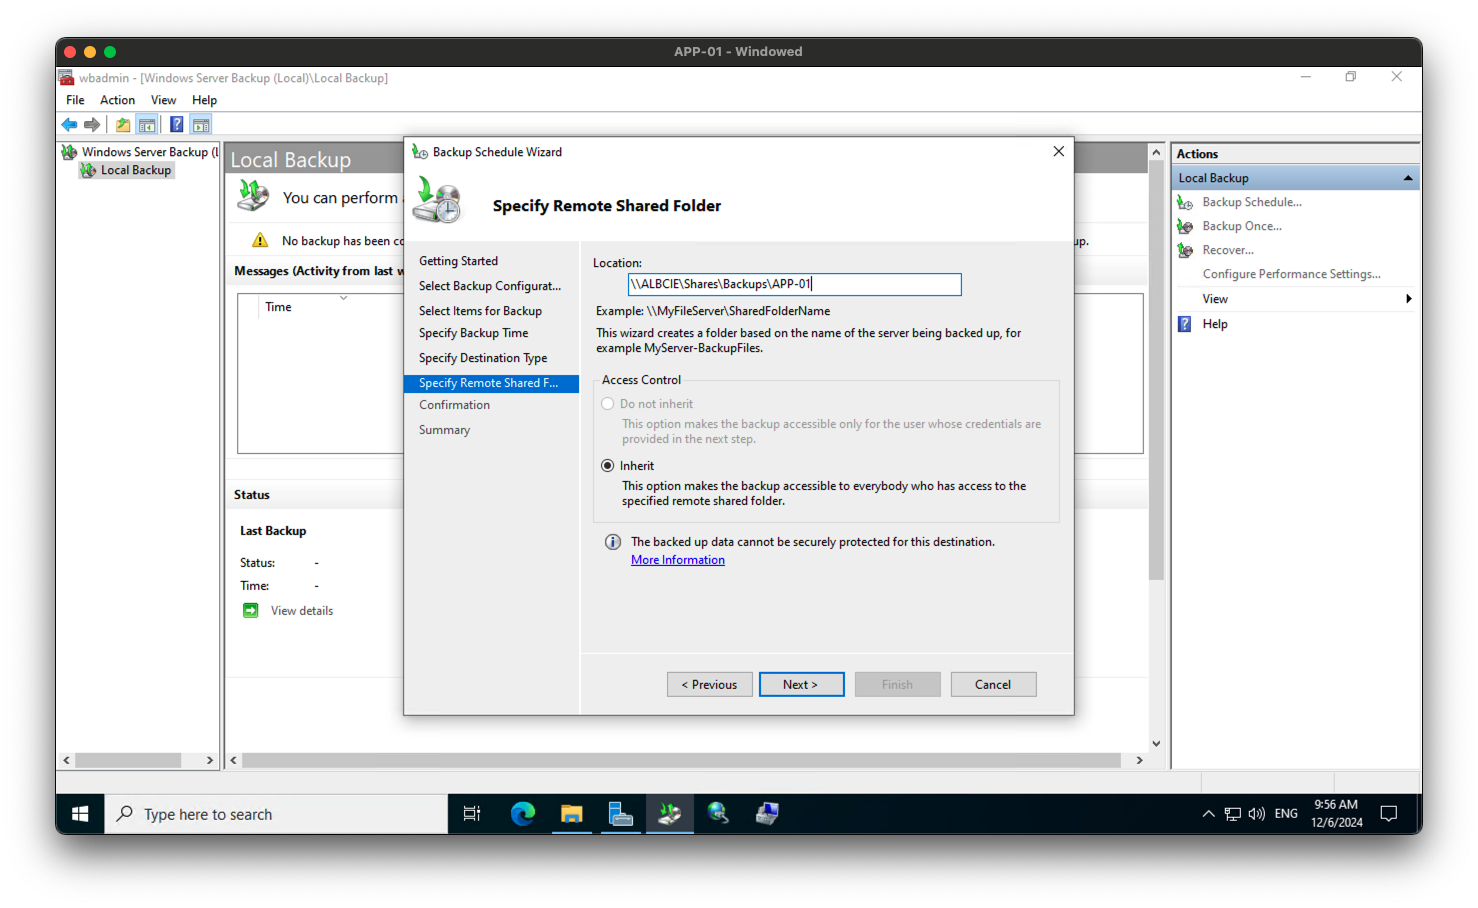
- In the Backup Schedule Wizard, enter the credentials to access the shared folder and click Next.
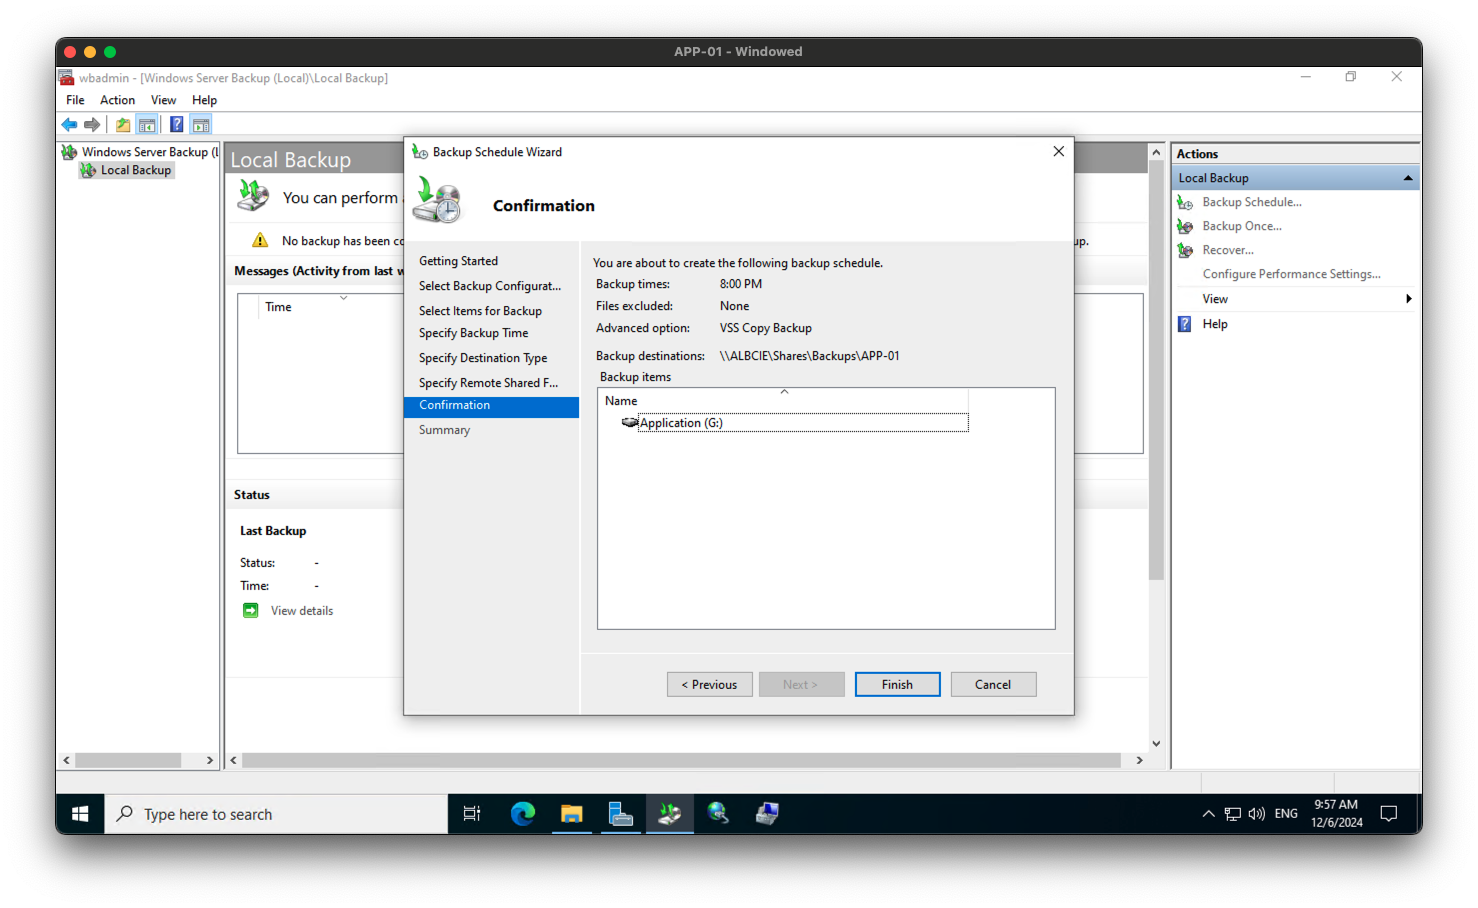
- In the Backup Schedule Wizard, review the backup settings and click Finish.
troubleshooting
- If you encounter any issues during the setup process, you can refer to the Windows Server Backup documentation for troubleshooting steps.
- You can also check the Windows Event Viewer for any error messages related to the backup process.
Tips
- Make sure to test the backup process regularly to ensure that your backups are working correctly.
- Store your backups in a secure location to prevent data loss in case of a disaster.
- Consider setting up a backup rotation schedule to keep multiple copies of your backups.
Conclusion
In this guide, we have set up server backups on Windows Server 2022. This will allow you to create regular backups of your server's data and system state, which can be used to restore the server in case of data loss or system failure. By following the steps outlined in this guide, you can ensure that your server is protected against data loss and system failure.
Tags
